
Field Material Request offers an easy material ordering workflow, so you can maximize visibility on material management across all projects.
Table of Contents
- Create a New Form
- Form Sections Explained
- Setting Up Your Form Structure
- General Settings
- Preview Form
- Copy a Form
Our Field Material Request workflow comes with a pre-loaded Material Request form, for your use. It is called Field Material Request and contains a material, equipment and replacement items section. However, if you wish to customize your own Field Material request, follow these instructions below.
You can always copy the Field Material Request default form and remove sections that are not needed.
Create a New Form
- Navigate to Admin - Forms
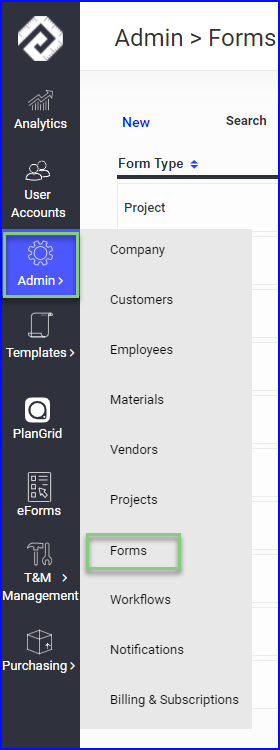
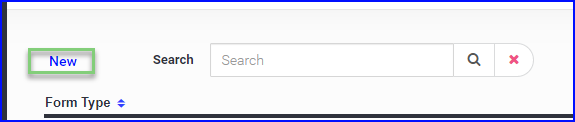
- Click on New
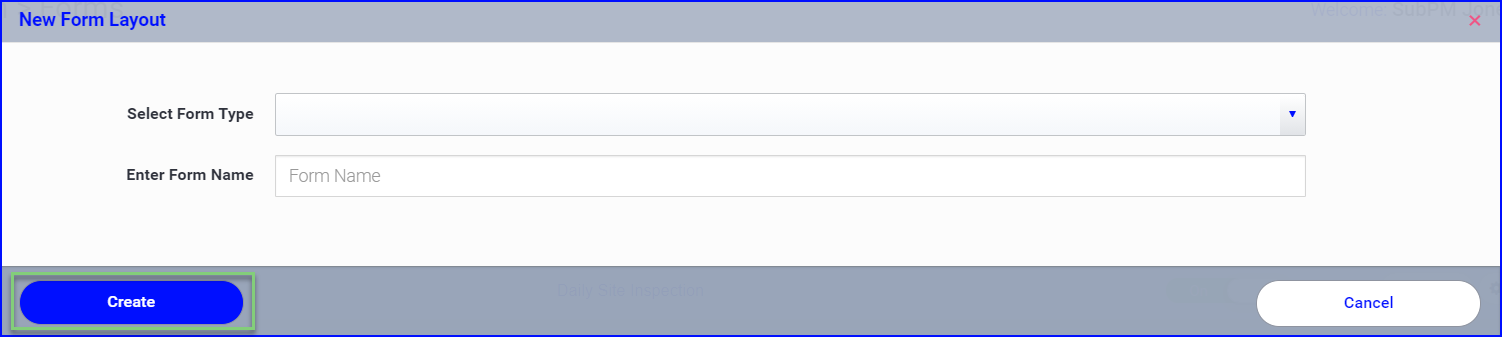
- Select Project as your form type and Enter a Form Name ( such as "Material Request Order" ) and click Create.
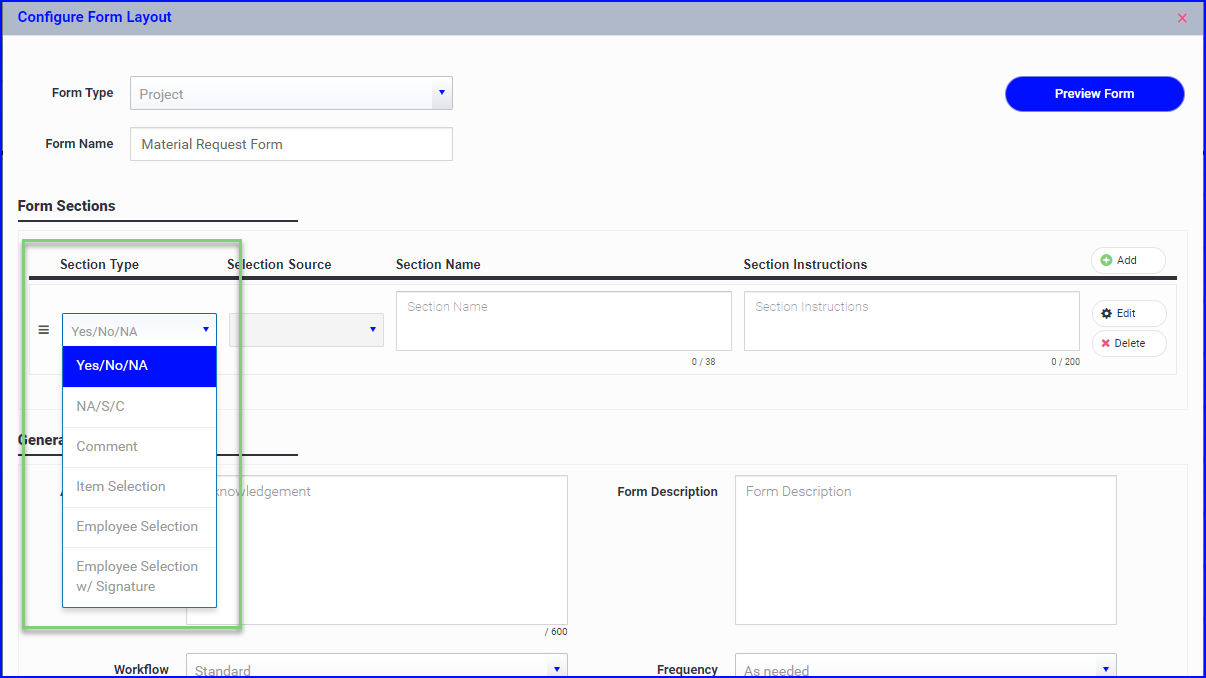
- The new form consists of different areas of information that are as follows:
- A header area which is the form type and name.
-
A form sections area which will contain the content of the form such as different groupings of questions.
-
A general settings area which contains the options and settings for this specific form when in use.
Form Sections Explained
The contents of your form are laid out in different sections and these section types are available to select in any order and combination to build your form. The section types are defined as follows:
-
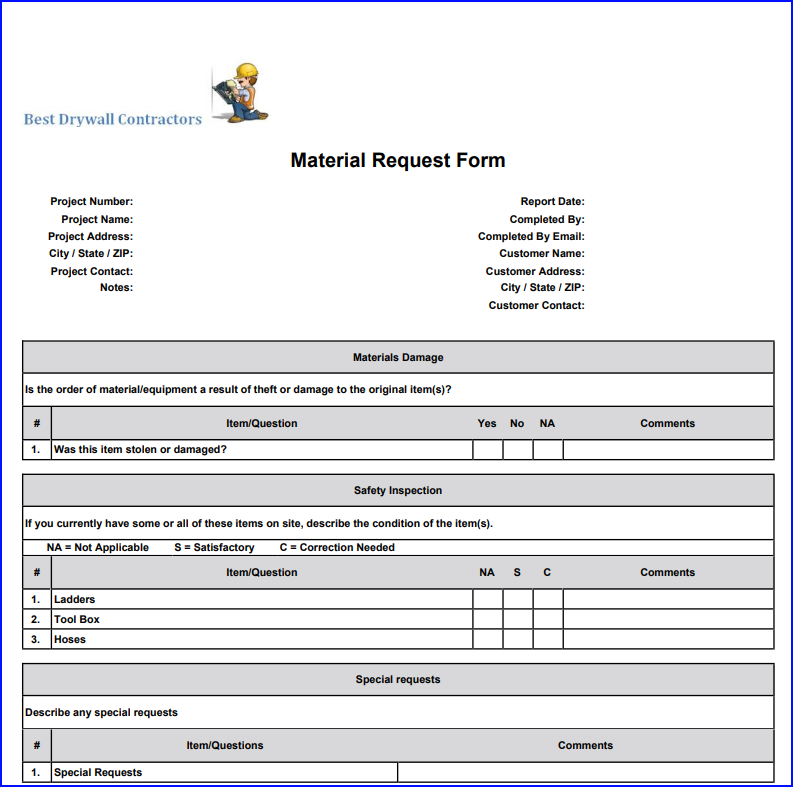
- Yes/No/NA - This is for question type information where the user would respond yes or no e.g. "Is the order of material/equipment a result of damage or theft to the original item(s)?"
- NA/S/C - Not Applicable, Satisfactory, Correction needed. An example of a use for this would be for safety type inspection questions presented to the user e.g. "If you currently have some or all of these items on site, describe the condition of the item(s)".
- Comment - This is a simple note type response to a question on a form, to be used when an event needs to be described, e.g. "Describe any special requests".
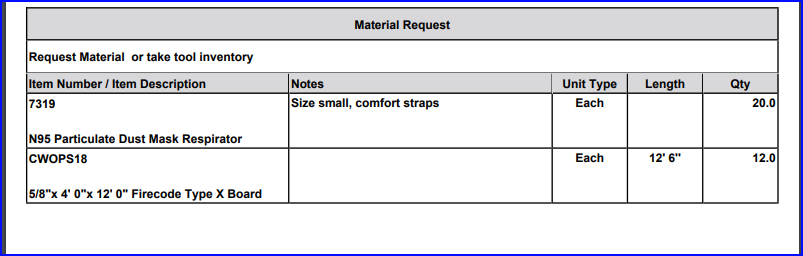
- Item Selection - This section type is connected to a pre-loaded, priced, master list and allows the user to select an item from the list. Currently this is connected to the material master list of your company or project. Use this section to create a Material Request from the field.
We are more than happy to assist you with building your forms using our system. Simply send a PDF of your form to support@peerassist.com and we can build it and send you an example of how it would look using our Field Material Request workflow.
Setting up your form structure
-
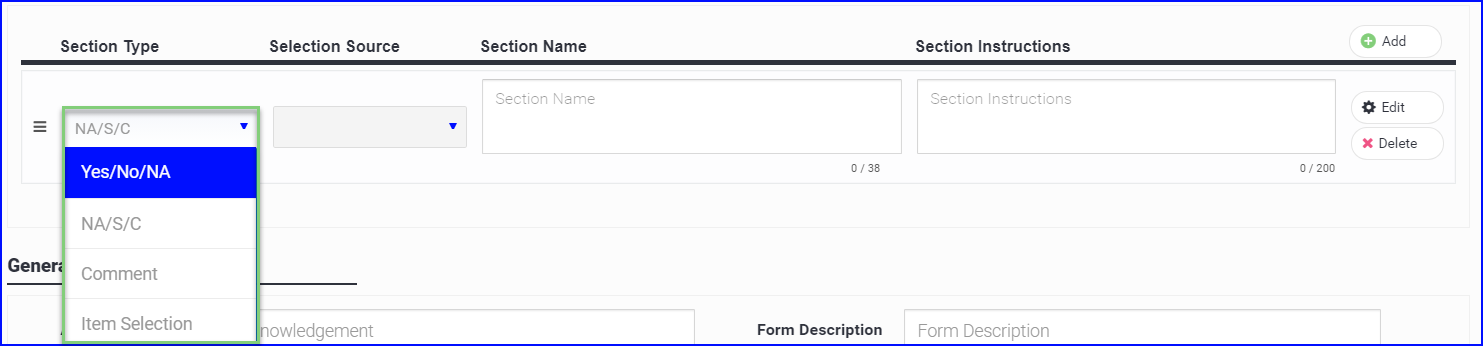
Click on Add to add a new section to your form.

-
Select the Section Type you wish to use ( Yes/No/NA, NA/S/C, Comment, Item Selection )
-
Enter the Section Name

-
Enter the Section Instructions

-
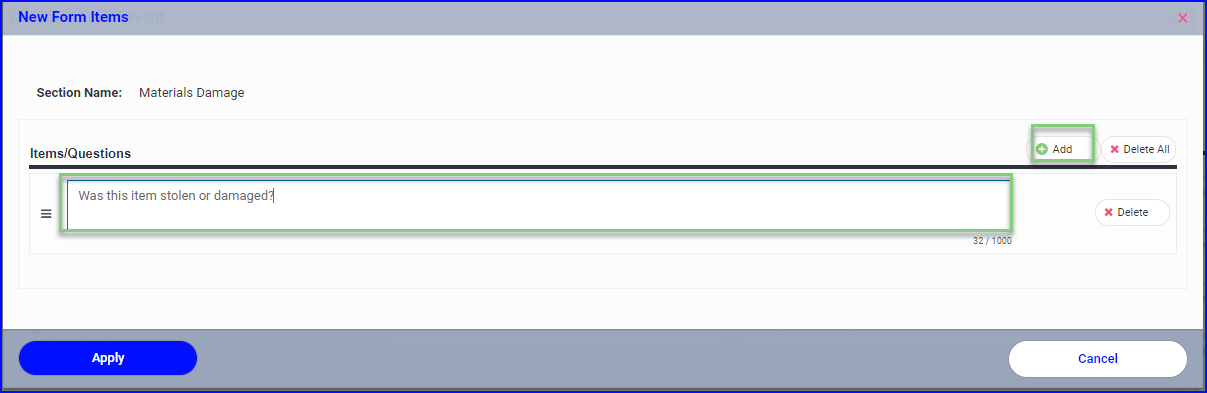
Click on Edit to add the list of questions/prompts for the user to complete.

-
Click on Add and then enter the question and repeat this until the section has been completed.
-
Click on Apply to save this section of your form.
After defining one section of your form you can repeat this process using any combination of section types until your form is complete.
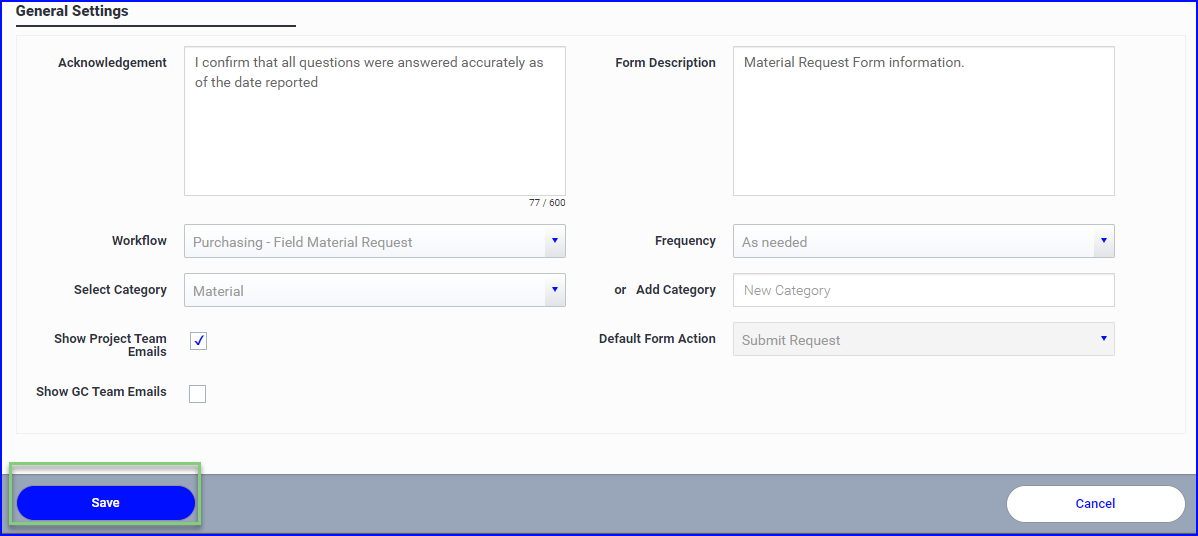
General Settings
- Scroll to the General Settings for the form

- The general setting fields are explained as follows:
- Acknowledgement - this is the text that will show up on the form when it is signed.
- Form Description - a simple description of the form for informational purposes only.
- WorkFlow - Purchasing - Field Material Request but as more Workflows are created, this will be selectable.
- Frequency - this indicates how often this report should be completed.
- Select Category or Add Category - organize your forms into different categories such as Safety Forms, Equipment Inspection Forms etc.
- Show project team emails - certain forms do not require the project team to be included.
- Default Form Action - when the form is completed on the iPad the user has options to Send for Signature or Mark Complete. This setting allows you to define which one should be the default.
- Show GC Team Emails - some forms are for internal use only and the GC team does not need to be included. Set this preference as needed.
Preview Form
- When all sections have been defined and the settings completed, Scroll to the top and click on Preview Form to review your form for accuracy.

- This is the version of the form to which your field employees will have access.
- You can see all section headers and questions in your selected layout, along with the acknowledgement and a place to capture signatures if required.

- When complete, click Save.
- To make your form Active, set its status to On.
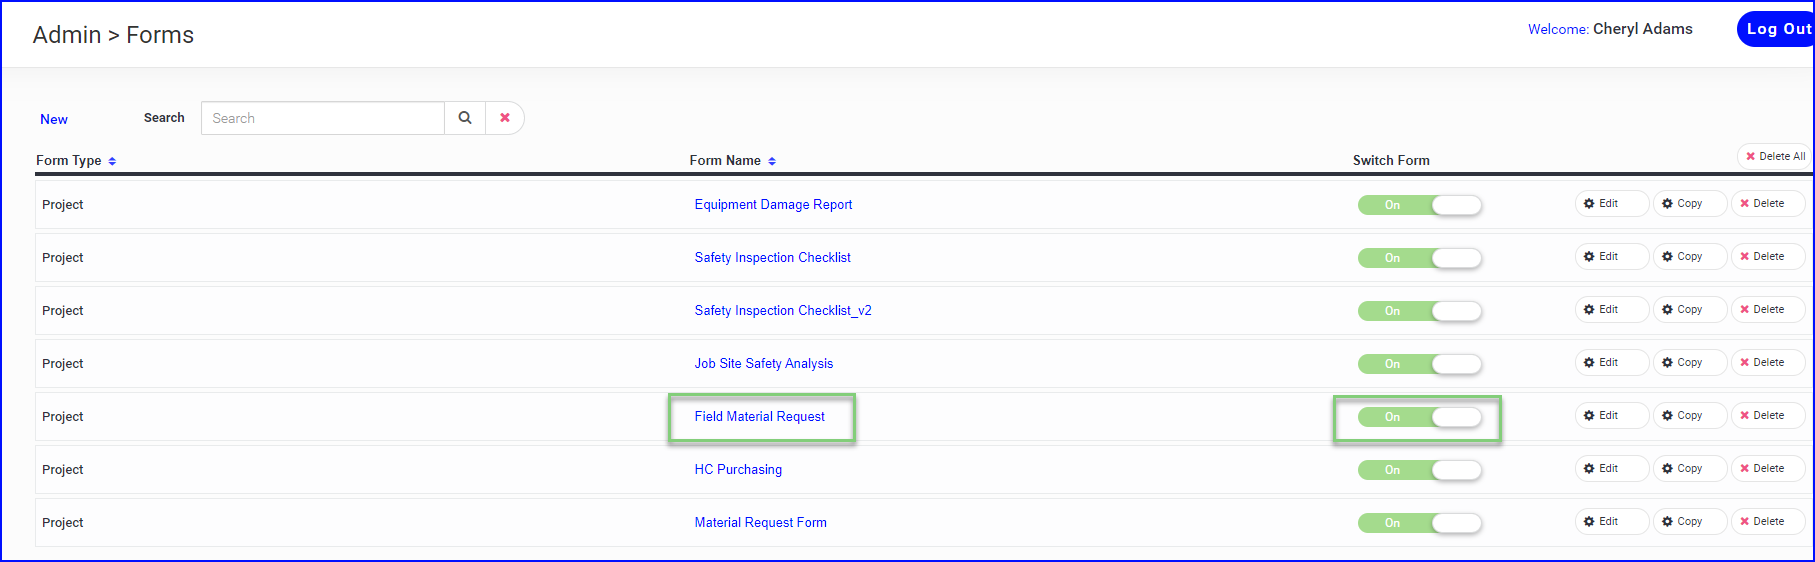
As long as any Form button is switched to On, it can be used on any project. Even if a form is project specific, you’re going to house it here. Switching to Off, will deactivate that form from use.
Copy a Form
Any form can be copied and then edited. This is very useful for forms that are very similar in format and just need changes to the questions being asked.
- Click on Copy on the form you wish to use.
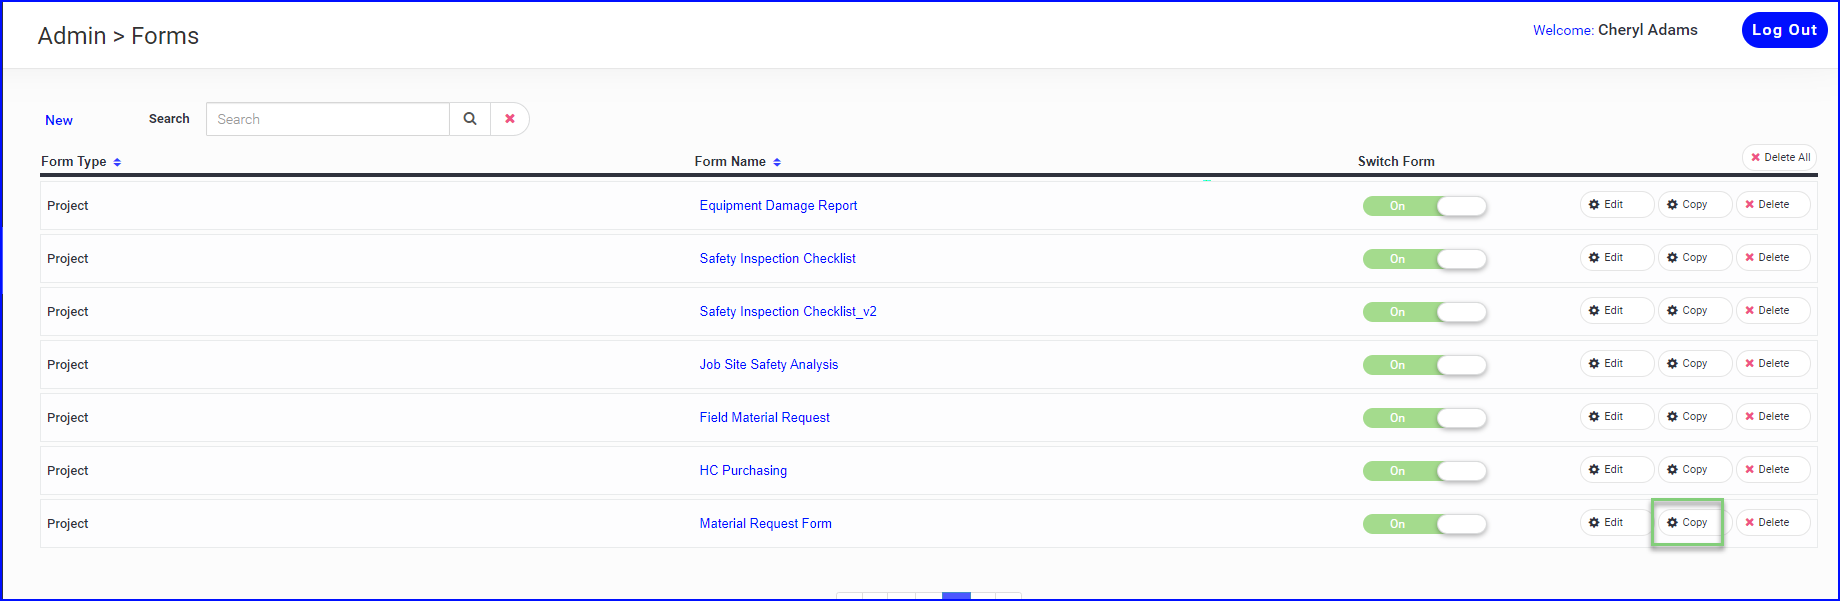
- The copy of the form will appear at the end of the list of forms

You are ready to deploy your forms to your users!
After building your forms, you are ready to deploy and have your job teams start completing their reports!