
Your company Admin can customize any field paperwork digitally. In this article, you will learn how to fill out an eForm on the mobile app.
Table of contents
Begin a New Form
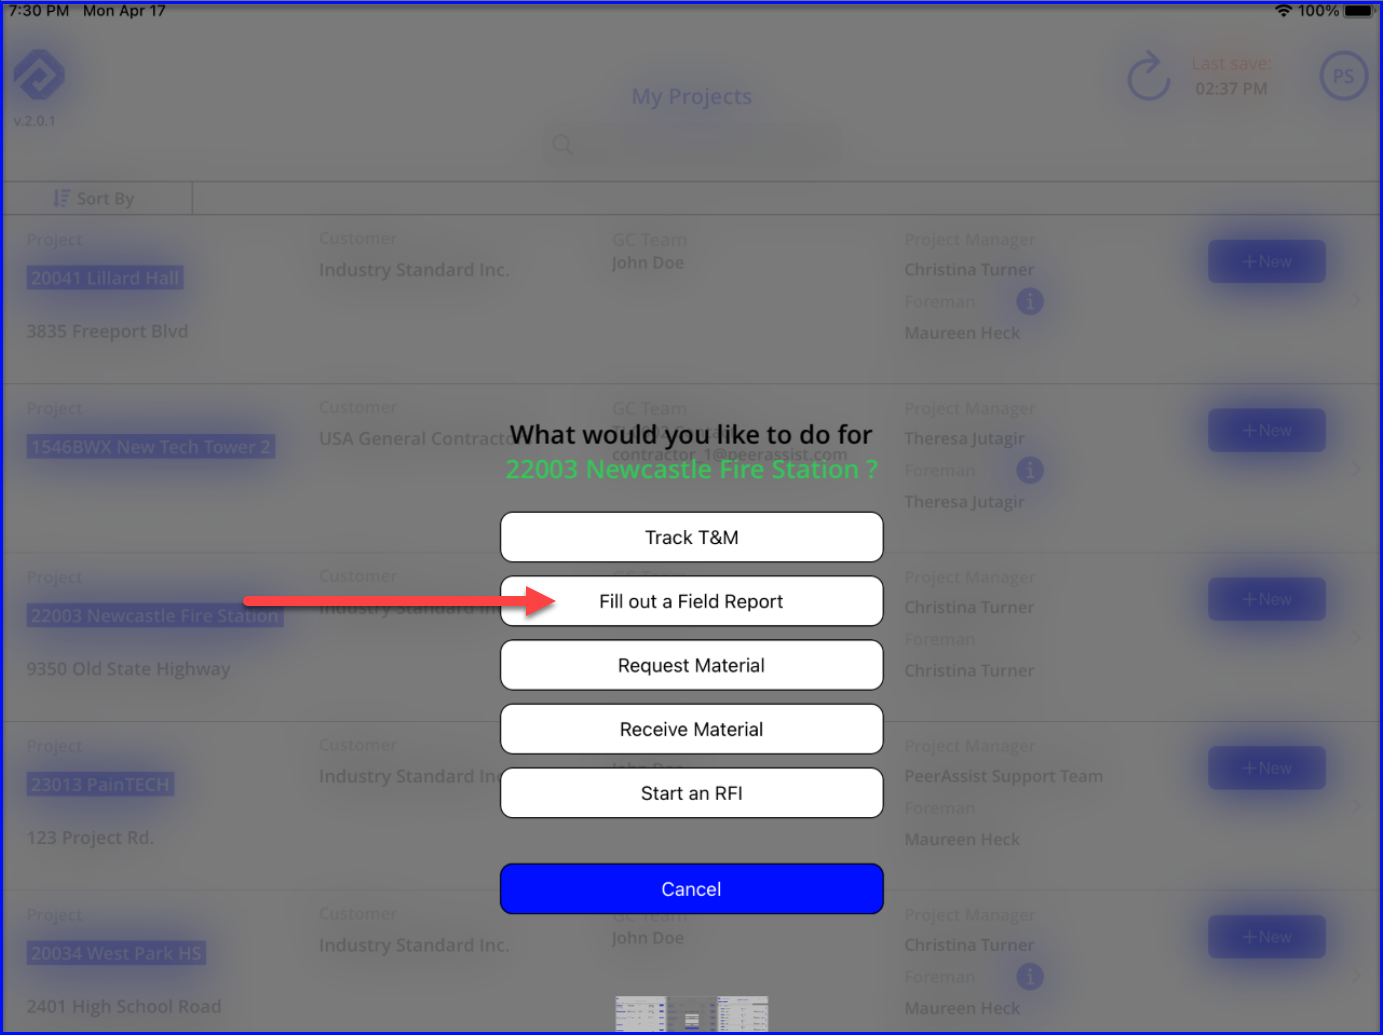
- From the My Projects starting page, tap the +New button for the corresponding project and then tap Fill out a Field Report
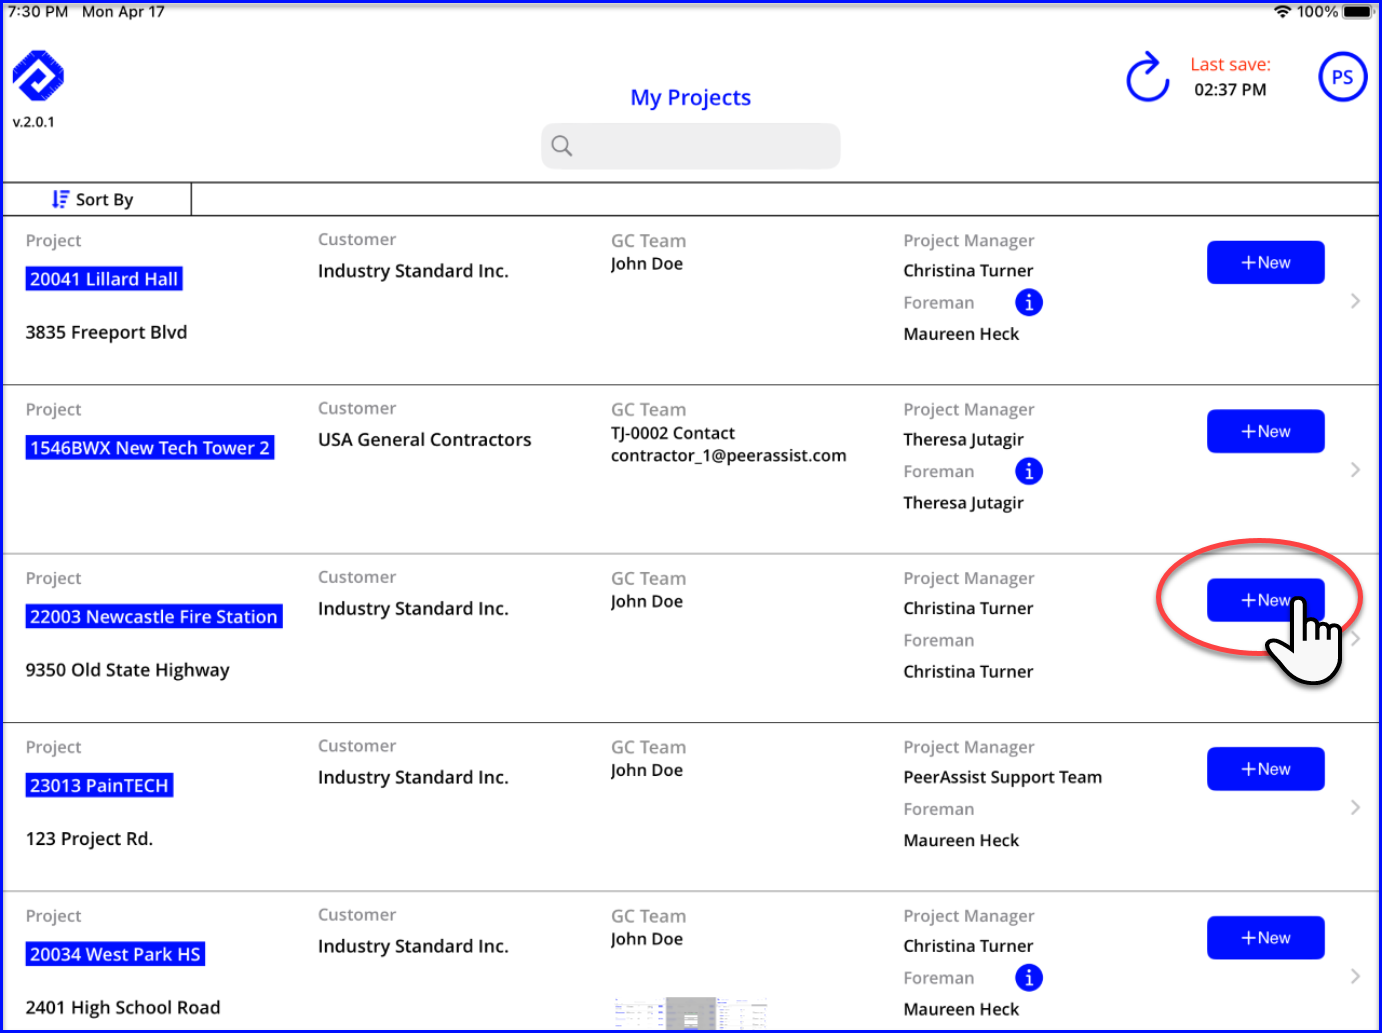
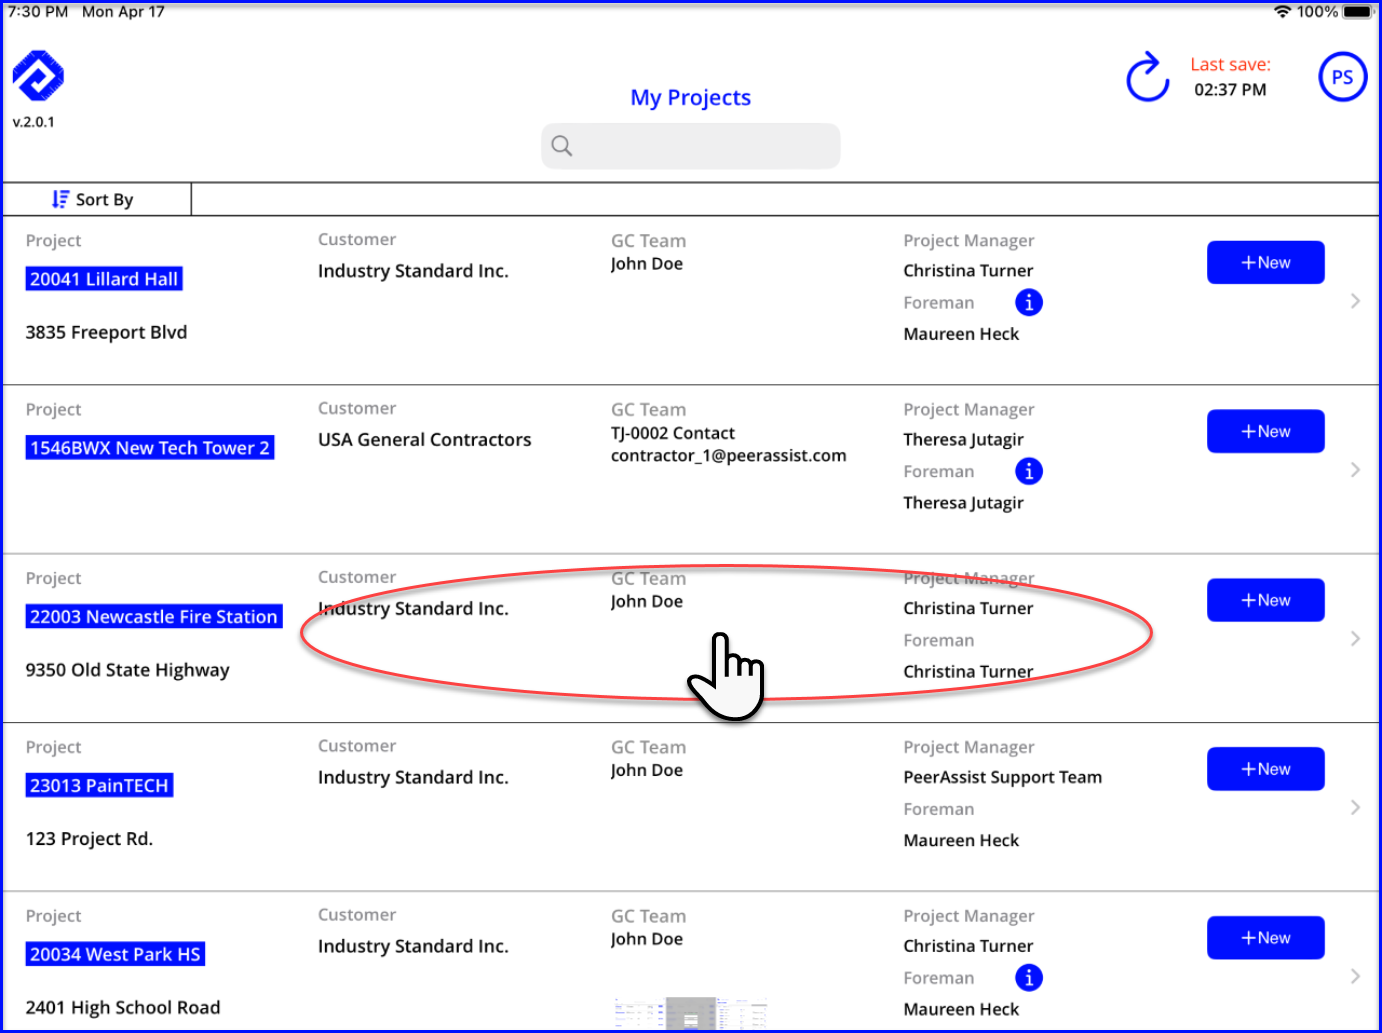
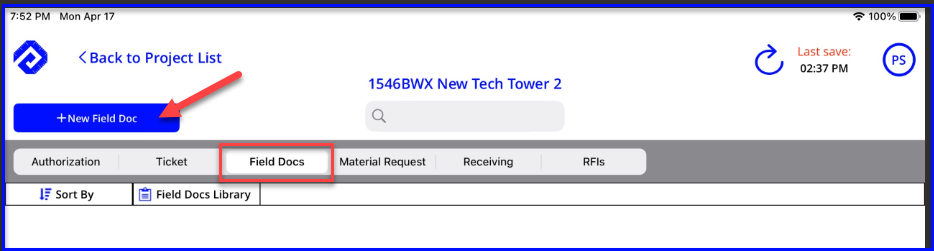
- Or, tap anywhere in the project row and then select the Field tab and New Field Doc
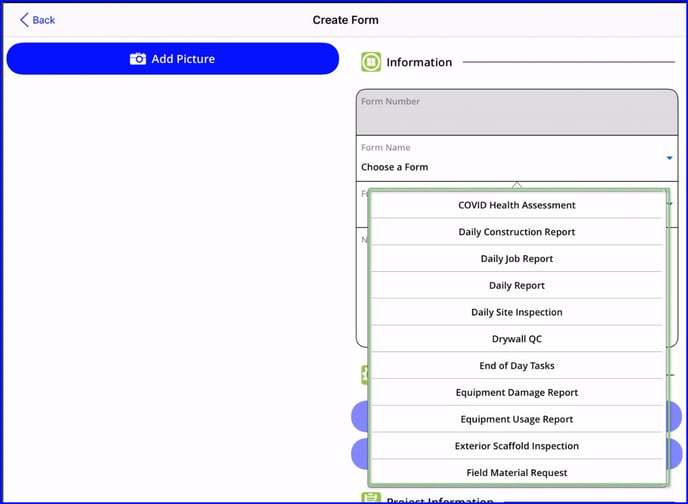
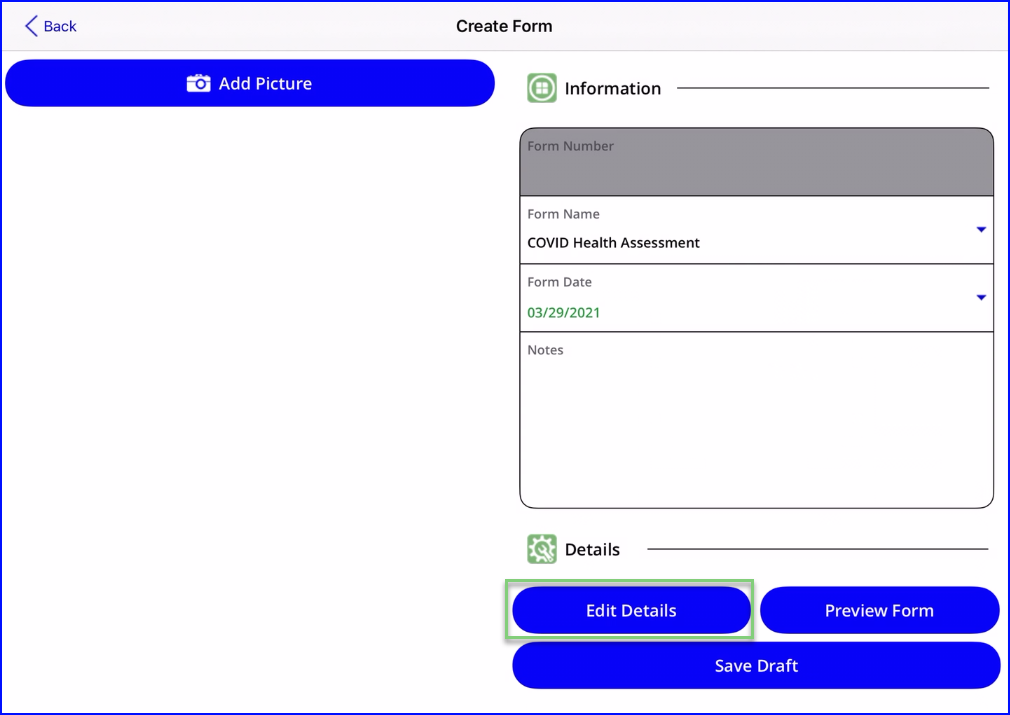
- Select the form that will be filled out by tapping on the Choose a Form drop down.
- If you don't see the form you are looking for, ask your company Admin to make sure it is switched on for the field's use.
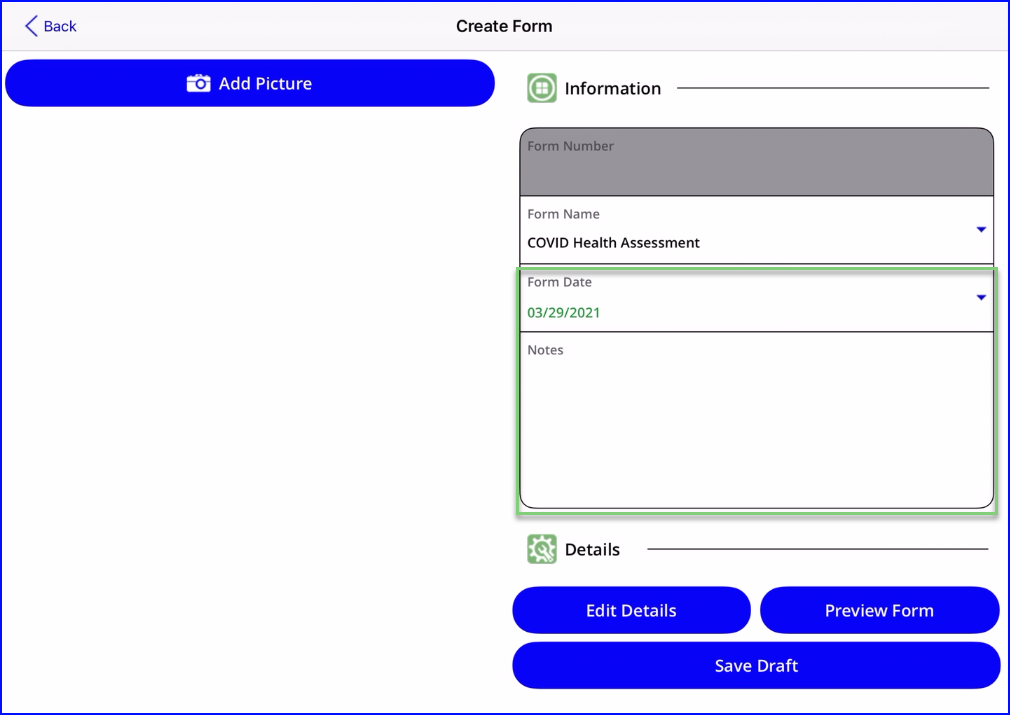
- Enter the Form Date and Notes if needed.
- Tap on Add Picture to add images to go along with the report being filled out. Some examples could be images of an accident, temperature readings or equipment inspections.
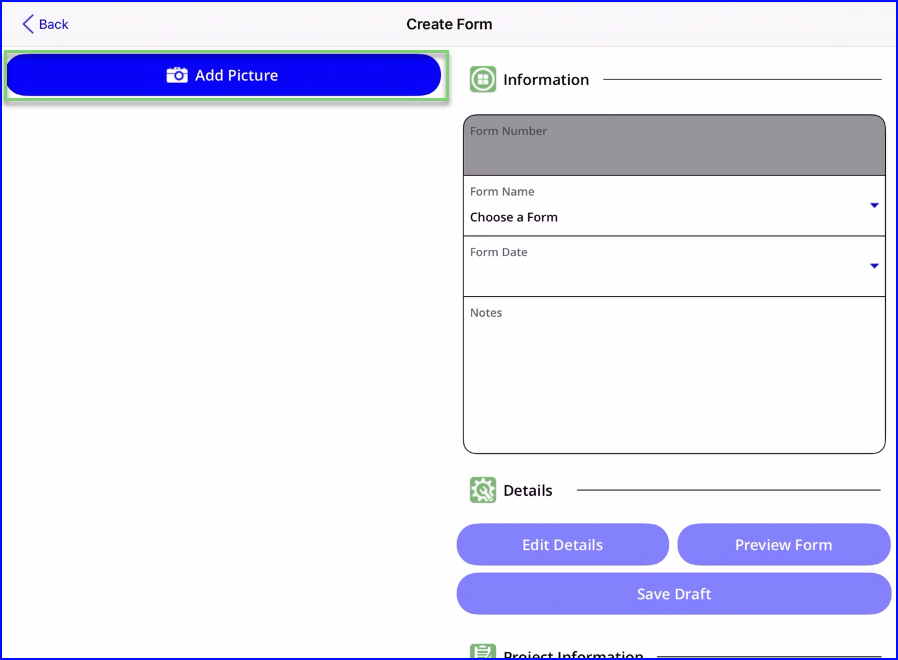
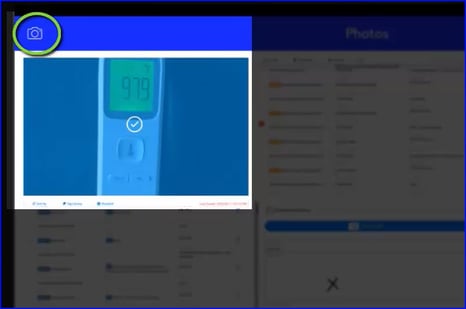
- The example below uses an image of a temperature check on a COVID assessment form.
- You can choose a photo from your camera roll or take a live picture.
At any time, you can click on Save Draft and come back to complete your form later.
Edit Details
- Tap on Edit Details start filling in the details of the form.
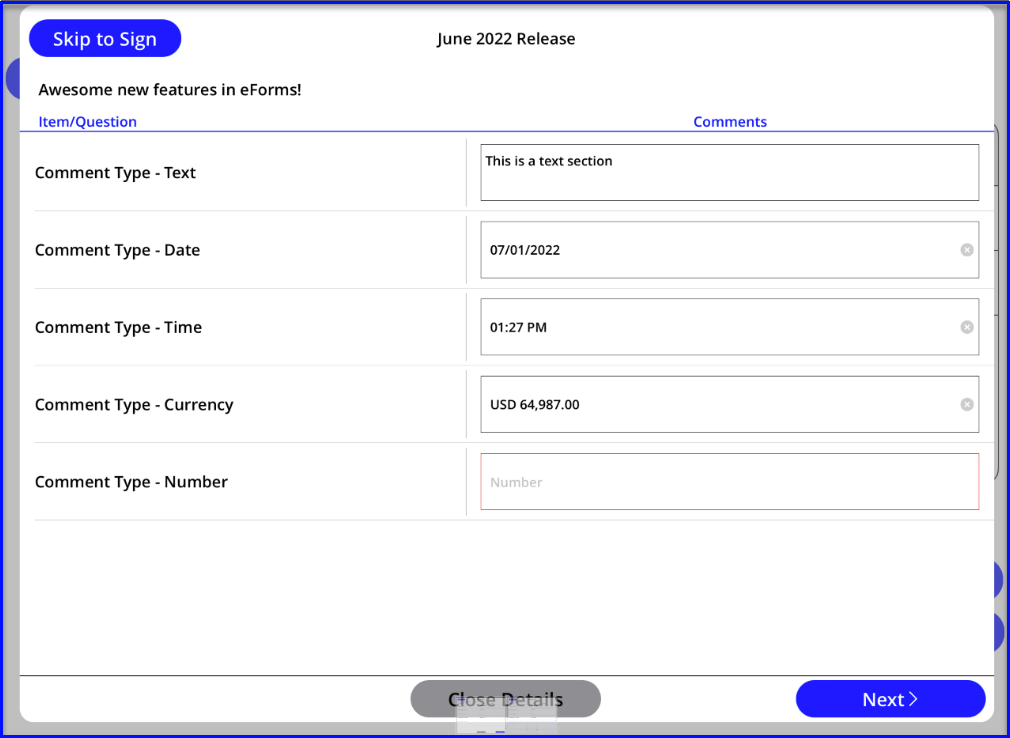
- Tap to check boxes or add comments where appropriate.
- Comment responses may open your text or number keypad, a day/time picker or format to comma/decimal currency format
Take advantage of the voice dictation feature on your tablet to add text comments quickly!
- If the form is related to materials, you may encounter a dropdown list to select items from the company list
- If the form is related to employees, you may encounter a dropdown list to select names
- There is an option to capture time-stamped employee signatures as well
- Tap Next to move through all questions and capture a signature.
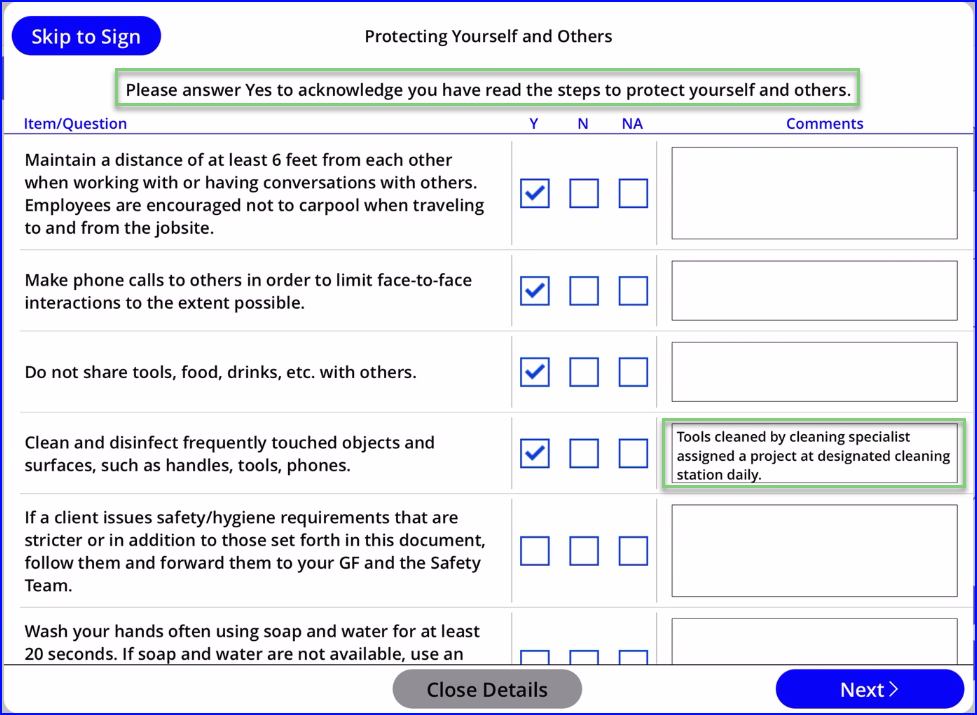
- Required fields will be outlined in red, and the form cannot be completed without a response
Sign Your Form
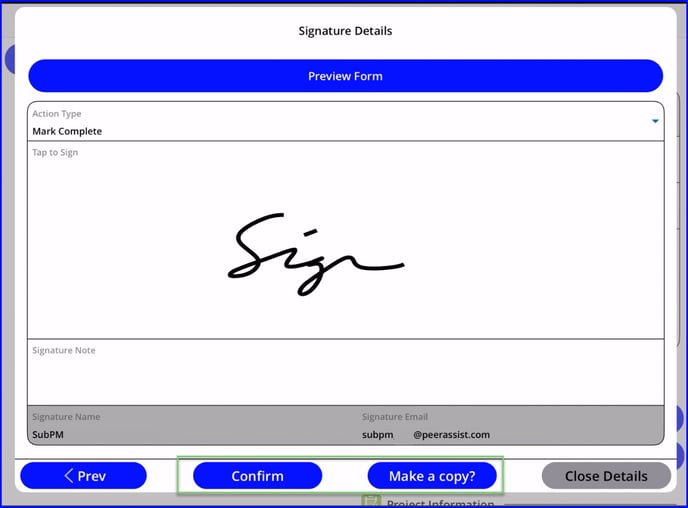
- Select Action Type. The choices are:
- Send For Signature: Allows you to sign the form then send it for additional approval signatures.
- Mark Complete: Allows you to sign the form, then send a completed copy to your team.

- Tap to Sign the form.

- Enter a Signature Note if needed.
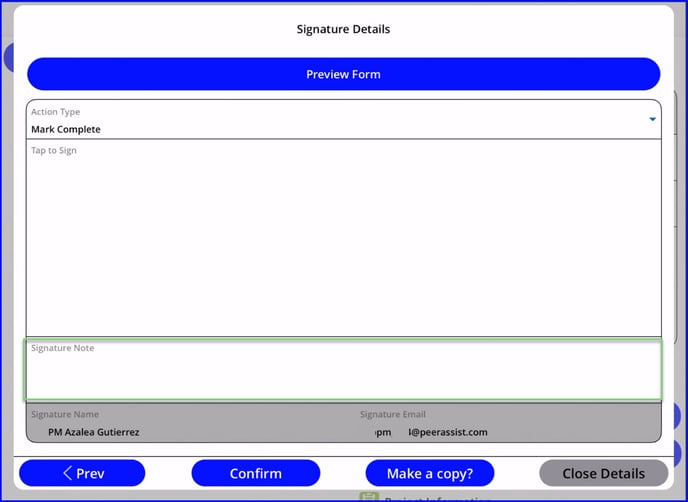
- Tap Confirm (Typical) or Make a Copy? (Optional)
- Confirm: Confirms your signature choice and proceeds to the next step.
- Make a Copy?: Confirms your signature choice, proceeds to the next step while simultaneously duplicating the form on to your dashboard in the Draft step. After completing the signature confirmations on this current form, you may edit the details of the copied from on the View List page. This option is intended to help create forms with similar data quickly.
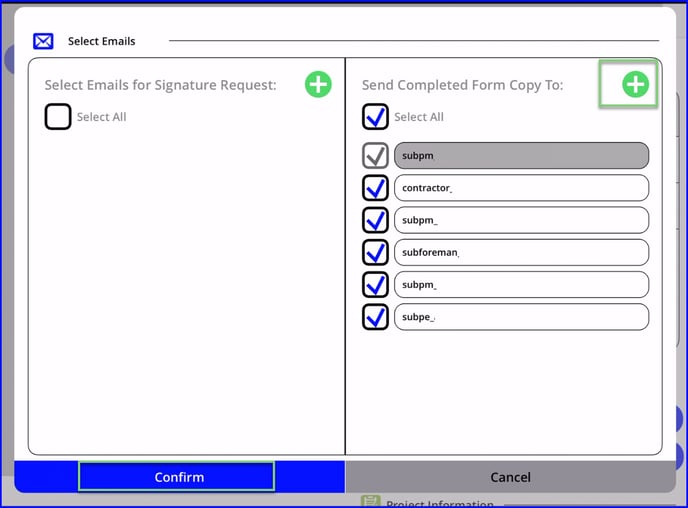
- An email form will open to allow the foreman to select the contacts who should receive a copy of the completed form. Tap on Confirm to continue.
- You will see a confirmation that the form was created and you will be returned to the View List page.
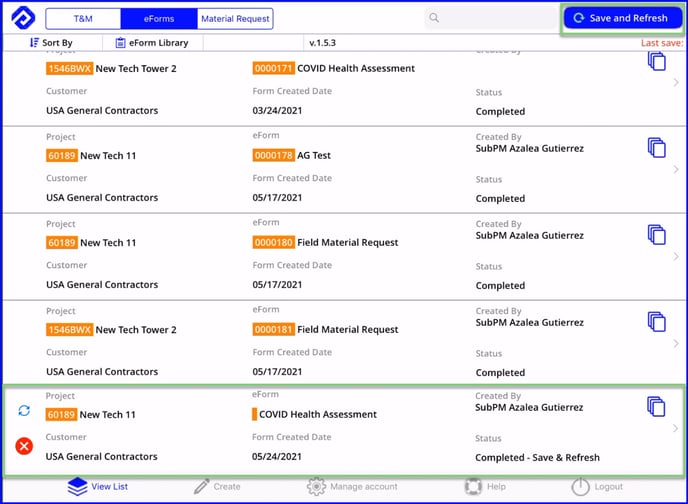
Save and Refresh
- Tap on Save and Refresh to update your Dashboard and send the completed form to the office.
Well done!
Now let's continue to Sign and Send a Form for Electronic Approval.