
You can determine which outgoing emails are sent from the platform, and to whom. You can set up default preferences for the whole company, modify preferences per project, and even set the GC's individual preferences.
Company preferences
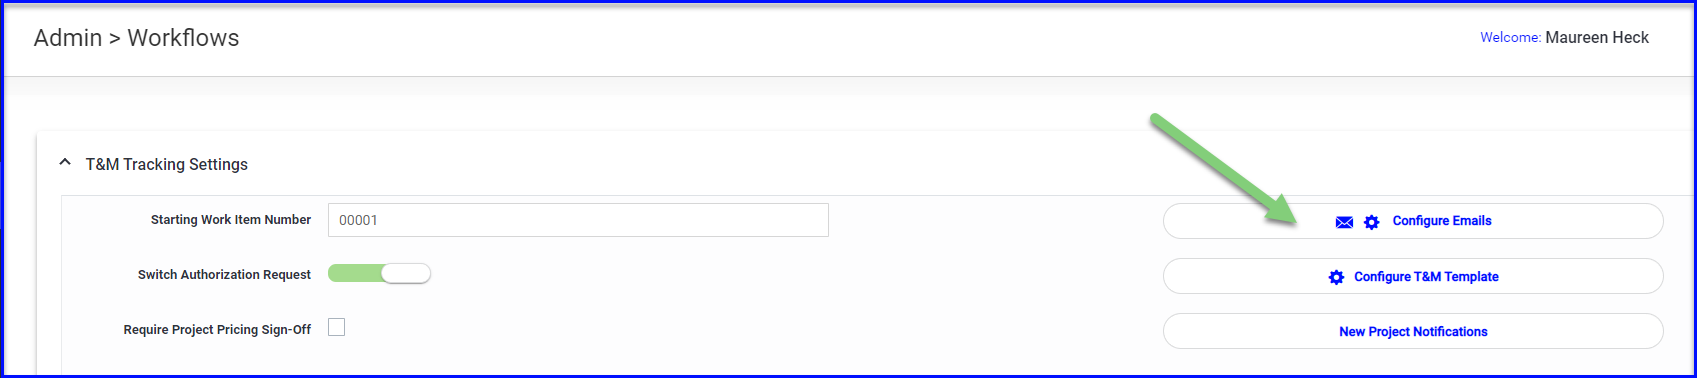
Set your company's default email preferences for all new projects in Admin > Workflows and click the Configure Emails button.
Skip down for an explanation of each of the settings.
GC preferences
If a GC wants to receive (or doesn't want to receive) certain emails for all of their projects, you can Edit their profile in Admin > Customer and use the Configure Customer Emails button to set their company's preferences.
To adjust the GC's email preferences for a single project, you can make the adjustment at the project level (see next section).
Skip down for an explanation of each of the settings.

Project-level email preferences
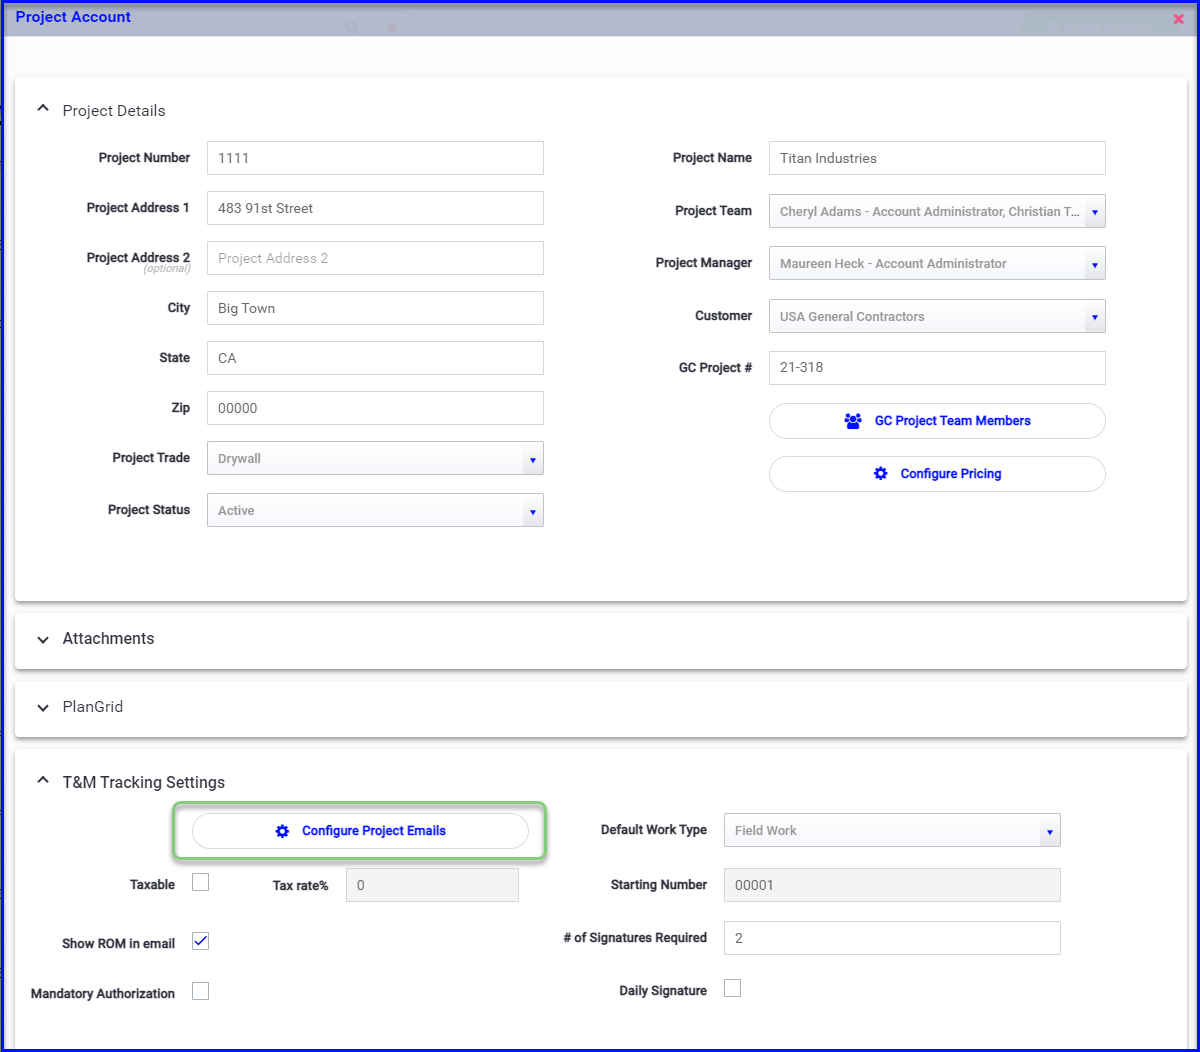
Users can customize email preferences on a project-by-project basis, for both the internal team as well as the GC project team. From Admin > Projects, Edit the project and find the Configure Project Emails button within the "T&M Tracking Settings" section.
Skip down for an explanation of each of the settings.
Explanation of each email settings
For each of the options detailed below, selecting the Internal Team and/or or GC Team will populate the email distribution for the corresponding action. The user can still remove people from the distribution and/or add additional recipients at their own discretion.
Un-checking both teams will also uncheck the setting to indicate that no email will go out but any action required can still be taken from the dashboard.
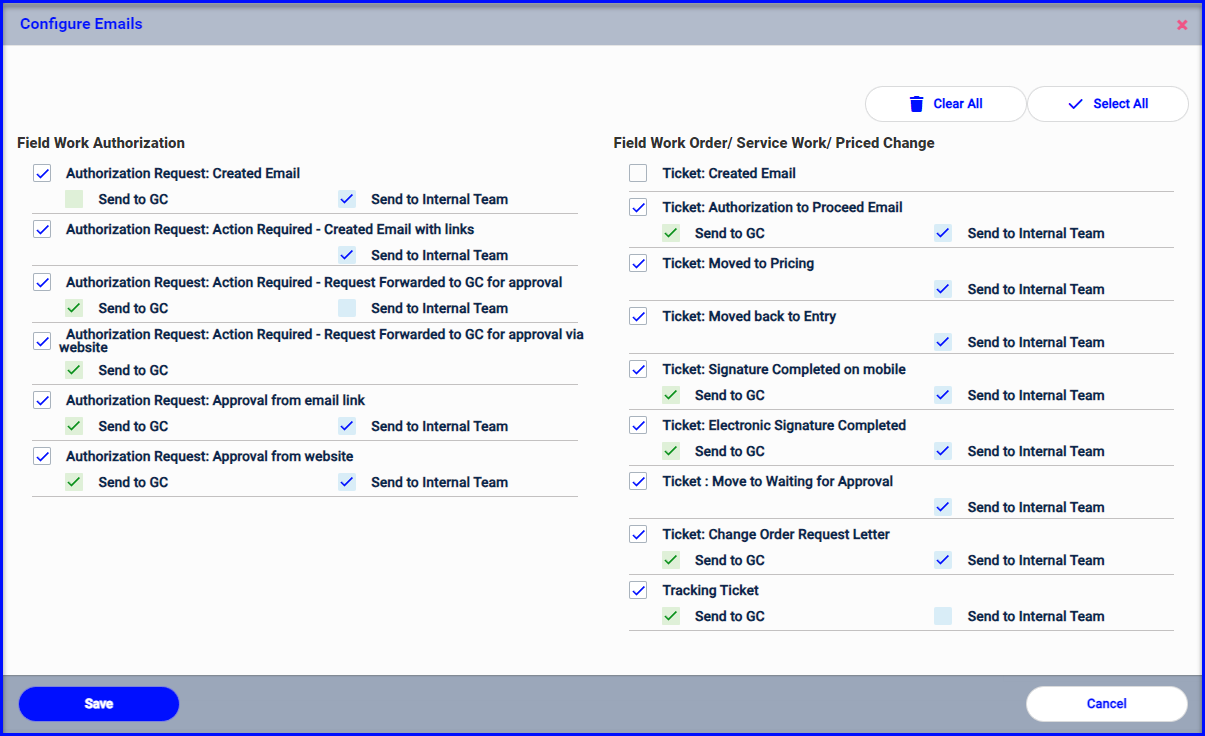
Field Work Authorization
- Authorization Request: Created Email - this sends a notification that an authorization request has been initiated, but does not include the ability to approve or forward the request. If nothing is checked, an email won't be sent but the internal team can still view and approve/reject/forward from the dashboard.
- Authorization Request: Action Required - Created Email with links - this sends an email to the internal team with links to approve or reject the request, or forward it to the GC. If nothing is checked, an email won't be sent but the internal team can still view and approve/reject/forward from the dashboard.
- Authorization Request: Action Required - Request Forwarded to GC for approval - if the PM forwards for GC approval from the "Created" email the GC will receive an email with links to approve or reject, and you can choose if you want to cc: the internal team
- Authorization Request: Action Required - Request Forwarded to GC for approval via website - when the PM forwards a request to the GC for approval from the dashboard, the GC will receive an email with links to approve or reject.
- Authorization Requested: Approval from email link - if a request is approved or rejected from the email, selected parties will receive a notification without any action required. Approved authorizations become a ticket and the field user can begin adding time and material.
- Authorization Requested: Approval from website - if the PM approves or rejects the request from the dashboard, selected parties will receive a notification without any action required. Approved authorizations become a ticket and the field user can begin adding time and material.
Field Work Order / Service Work / Priced Changes
- Ticket: Created email - this is an email notification that a ticket has been started. There is no action required, and it does not mean the work is complete or has been signed off in the field. If you choose not to notify anyone, project team members will still see the ticket on the dashboard.
- Ticket: Authorization to Proceed Email - this is a notification that the user has captured a signature on the device with the "Authorization to Proceed" action type. It is different from an Authorization Request (which get the signature before a ticket is started and includes an attachment for backup). The "Authorization to Proceed" option allows the user to capture a signature of approval on a ticket that has already been started which is date/time-stamped on the ticket PDF.
- Ticket: Moved to Pricing - this email will notify the internal team that a ticket has been signed which automatically moves it to the pricing step. A ticket can also be "pushed" to pricing from the dashboard bypassing the signature, which will also send an email notification to the team.
- Ticket: Moved back to Entry - this email notified internal team members when a ticket in pricing is "Returned to Entry Status" so that changes can be made. This can only be done from the dashboard, however you will lose any signatures that were captured.
- Ticket: Signature Completed on mobile - this notifies the selected team(s) when a ticket is signed on the device. The signer will receive a copy even if you do not elect to send the GC team a copy.
- Ticket: Electronic Signature Completed - this notifies the selected team(s) when a ticket that has been sent via email has been signed. The signer will receive a copy even if you do not elect to send the GC team a copy.
- Ticket: Move to Waiting for Approval - this is an internal notification that let's the person who approves and sends the change order request when pricing has been completed.
- Ticket: Change Order Request Letter - select if you want to include the GC team and/or Internal Team when you send a Change Order Request. If the email is turned off, no email will be sent but the COR will move to the Change Order Log, and you can download the PDF to file or send outside of the platform if needed.
- Tracking Ticket - you can choose if you want to notify the GC or internal team of any work tracked (via "Tracking Only Tickets) but not requested on a change order.