Learn about writing & submitting RFIs, uploading & sharing responses with the field, and keeping an RFI Log in the PeerAssist platform.
Table of Contents
Dashboard & Statuses
The RFI workflow is within the Project Management dashboard, in the RFI tab.
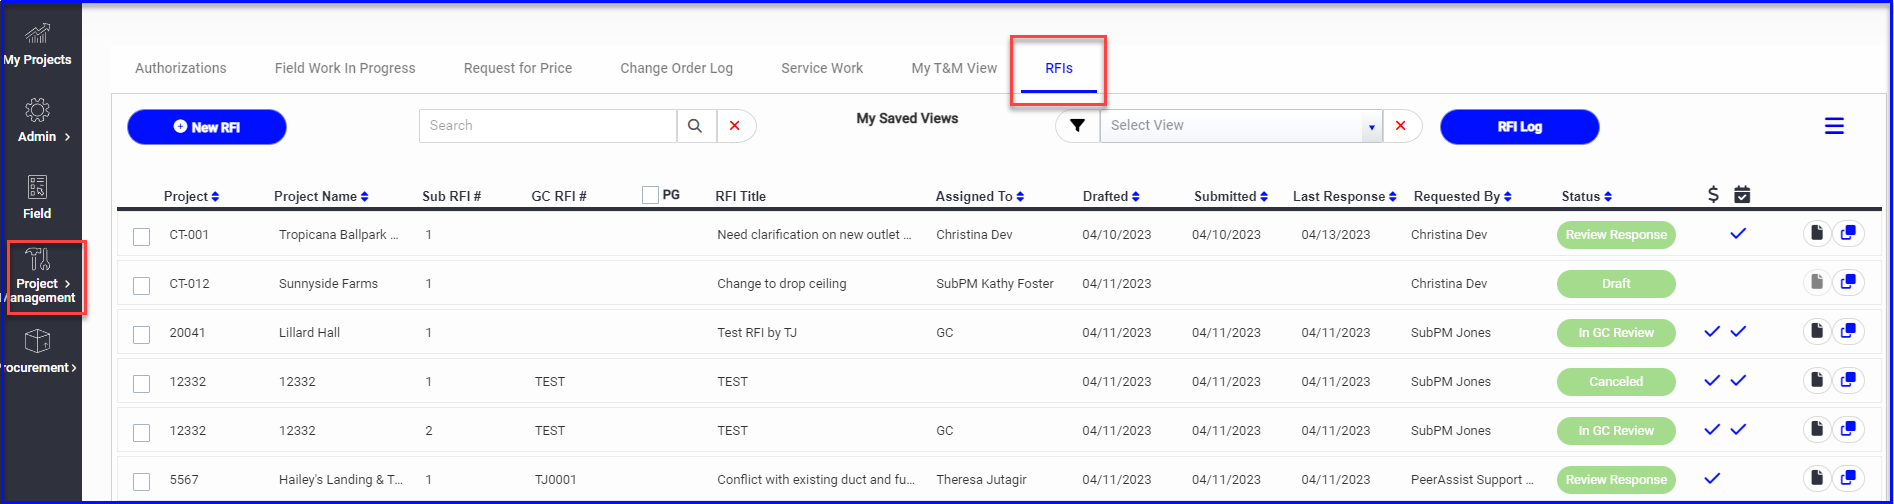
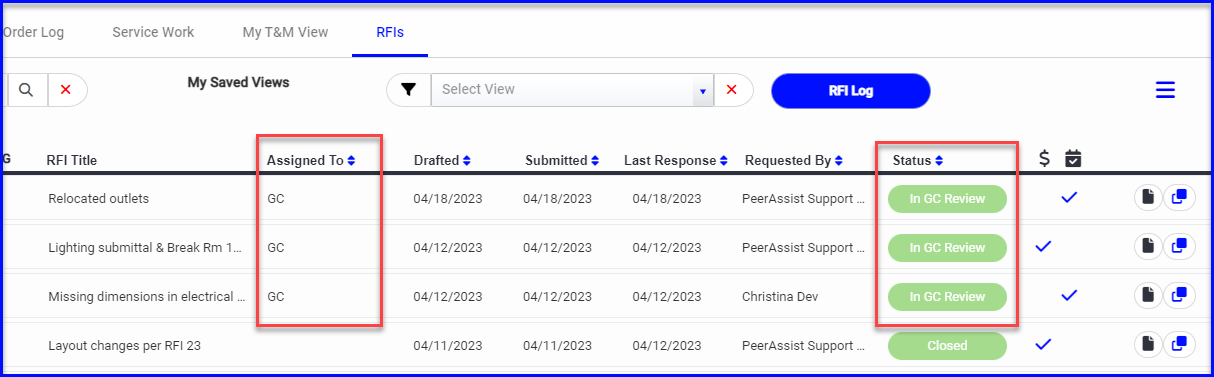
The dashboard displays lots of useful info such as:
- Project info
- Sub & GC RFI numbers
- The RFI title for quick reference
- Requested By and Assigned To helps teams keep track of whose court it's in
- Dates Drafted, Submitted & Responded
- Status: Draft, In GC Review, Review Response, Closed (Cancelled RFIs can be accessed with filters)
- Cost/Schedule Impact indicators
- View/Copy the RFI
RFI statuses are as follows:
- Draft stage (the field and office can pass the RFI back and forth for review while in the draft stage)
- In GC Review: when an RFI is submitted to the GC it will move to this stage until a response is logged. An RFI can also be put back to "In GC Review" after a response is received.
- Review Response: when a response has been logged and needs to be reviewed by team members before being Closed.
- Closed: when the RFI response is sufficient and the question is answered. Closed RFIs stay on the dashboard to continue documenting cost/schedule impact and for the field's reference on the mobile app.
- Cancelled: when an RFI is created in error or is no longer needed, but remains accessible through filters.
Creating an RFI on the Desktop
An RFI can be started from the field (mobile app) or office (desktop app).
- To start an RFI on the desktop, use the +New RFI button, then select the project & RFI form (if there is more than one option)
The following applies to new RFIs started on the desktop as well as RFI Drafts that the field has sent for internal review.
- Fill out RFI details as needed.
- The RFI Title is required
- The Date Response Needed, Drawing/Sheet/Other reference and Cost/Schedule Impact is optional and can be updated at a later time.
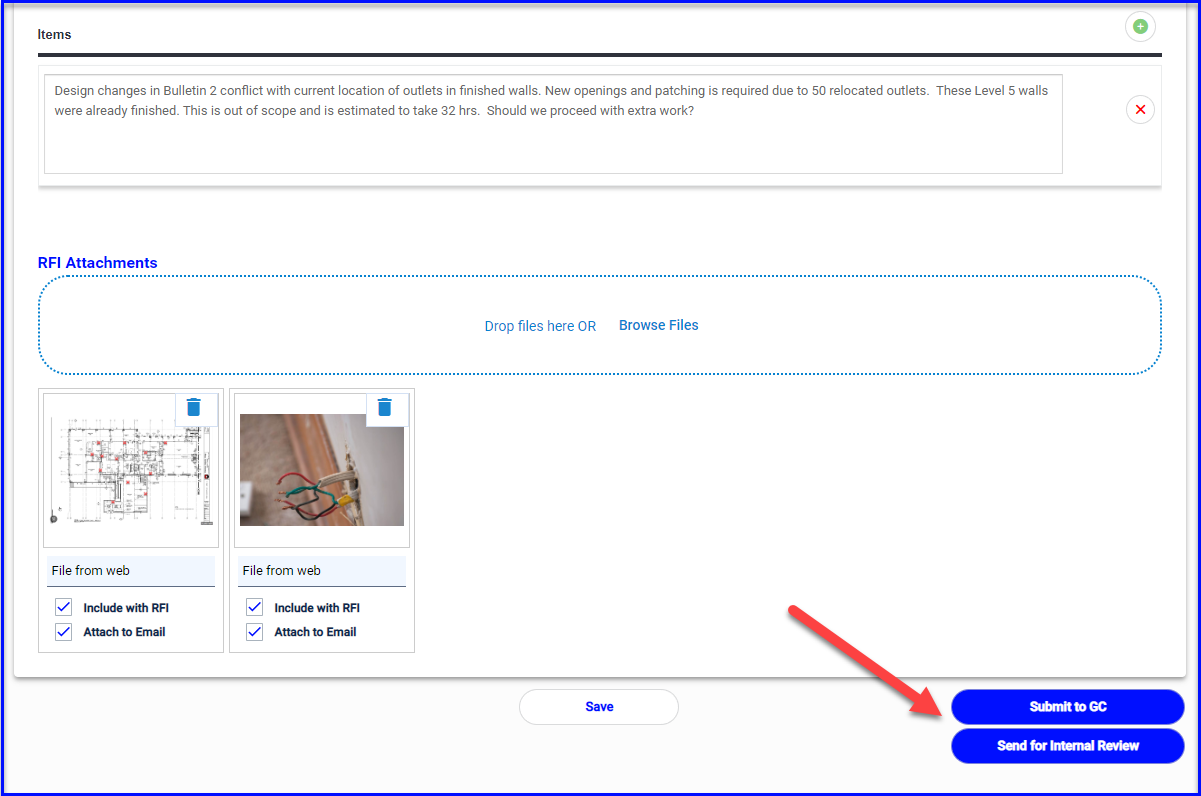
- Enter the request in the blank Item section, and use the green + for additional questions if needed
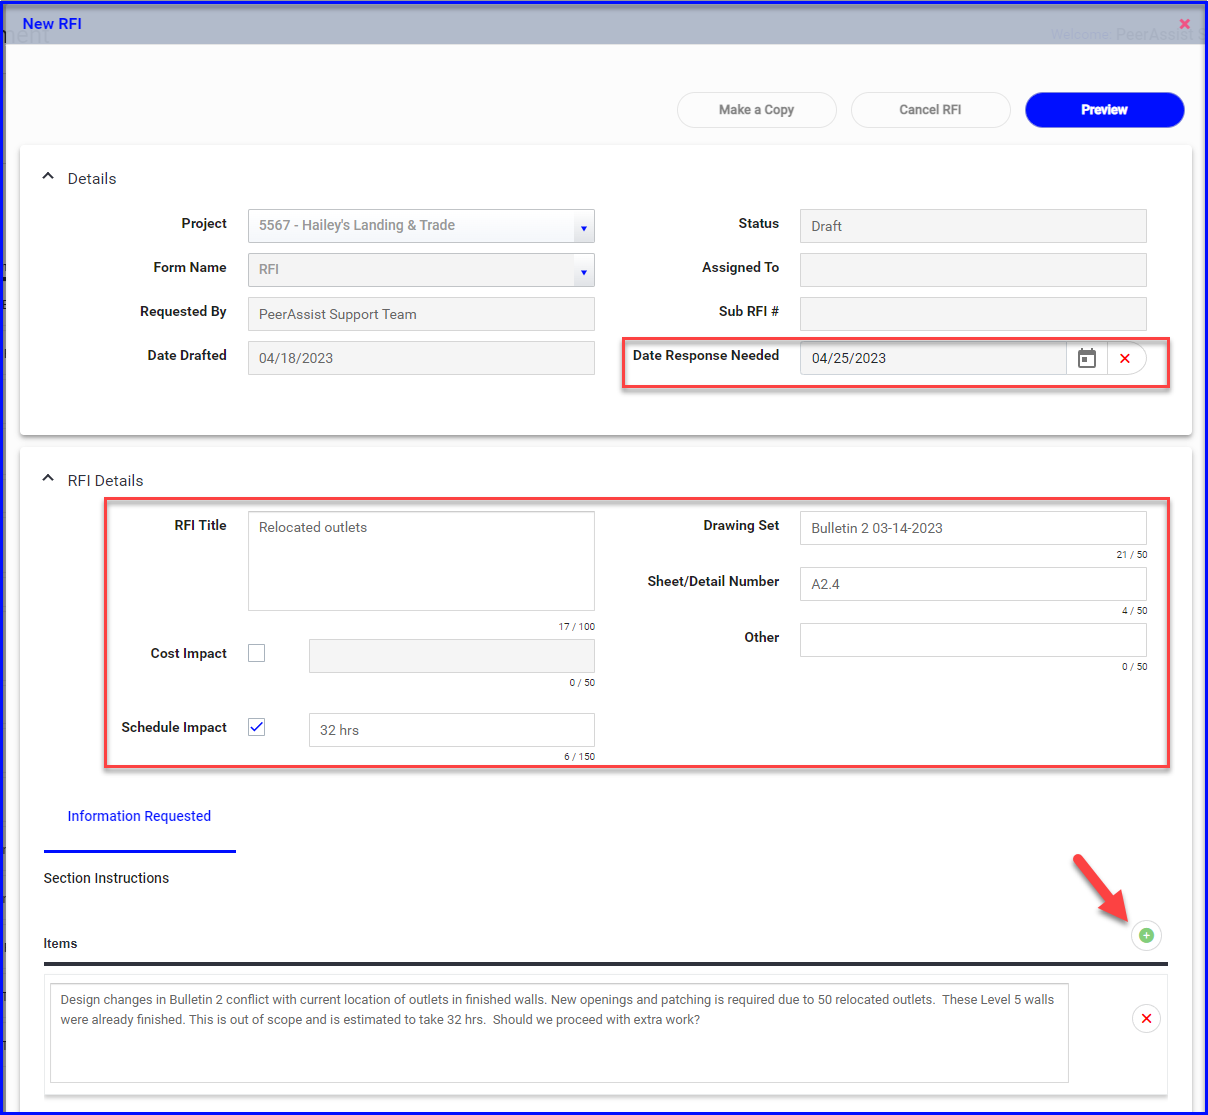
- Add photos to the RFI as needed
- When finished you can Submit to the GC or Send for Internal Review (if you want another team member in the field or office to review your RFI before it is submitted).
- If you Send for Internal Review, you'll be prompted to Assign To the team member that you want to review the RFI.
- You have the option of adding a message which they'll receive via email, and will also be visible on the RFI Activity Log.
- The RFI will remain in the Draft stage, and the Assign To will make it clear to everyone whose court it's in.
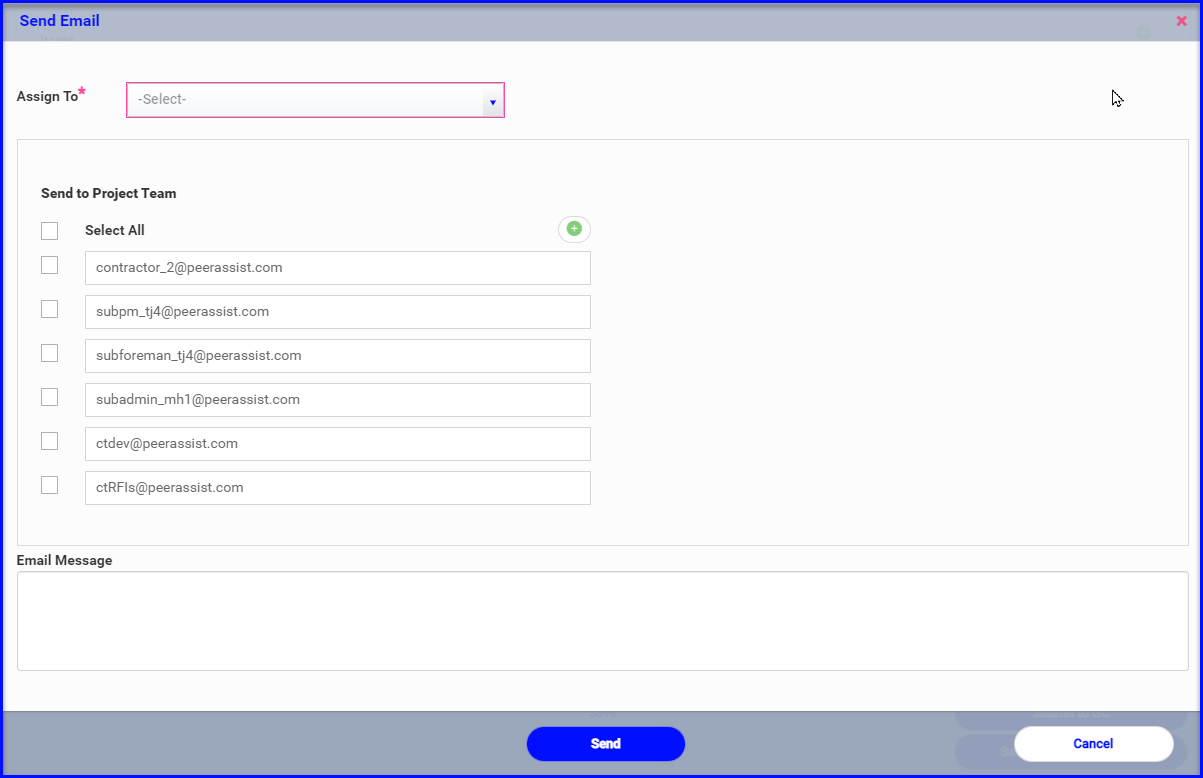
- When you Submit to GC, you'll have an opportunity to customize the message to the GC, and make changes to the project & GC team members copied on the email.
- The RFI will automatically move to the In GC Review step, and be Assigned To the GC.
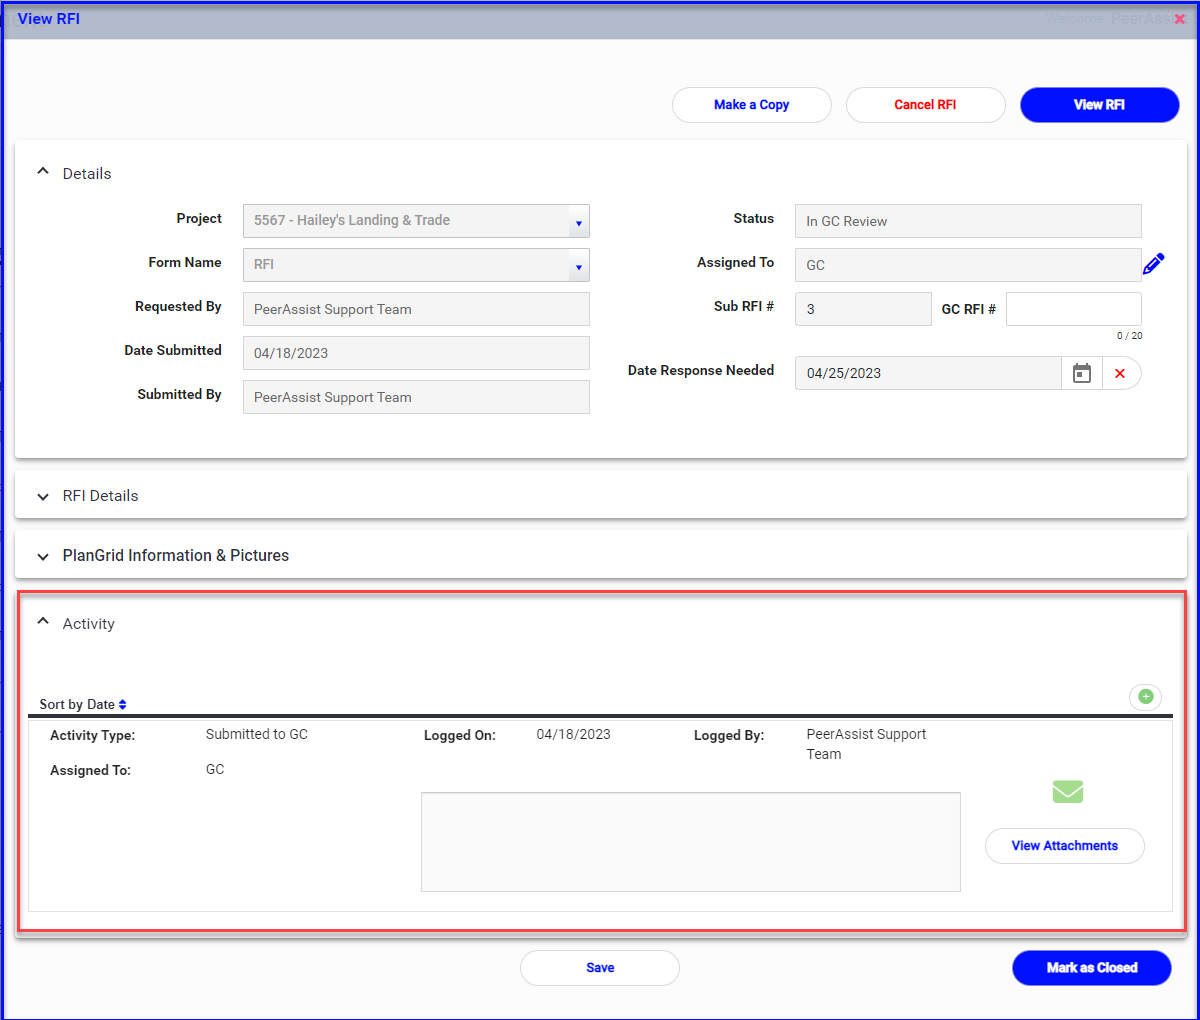
The Activity Log
RFI responses, and other team communications, are tracked in the Activity Log within the RFI.
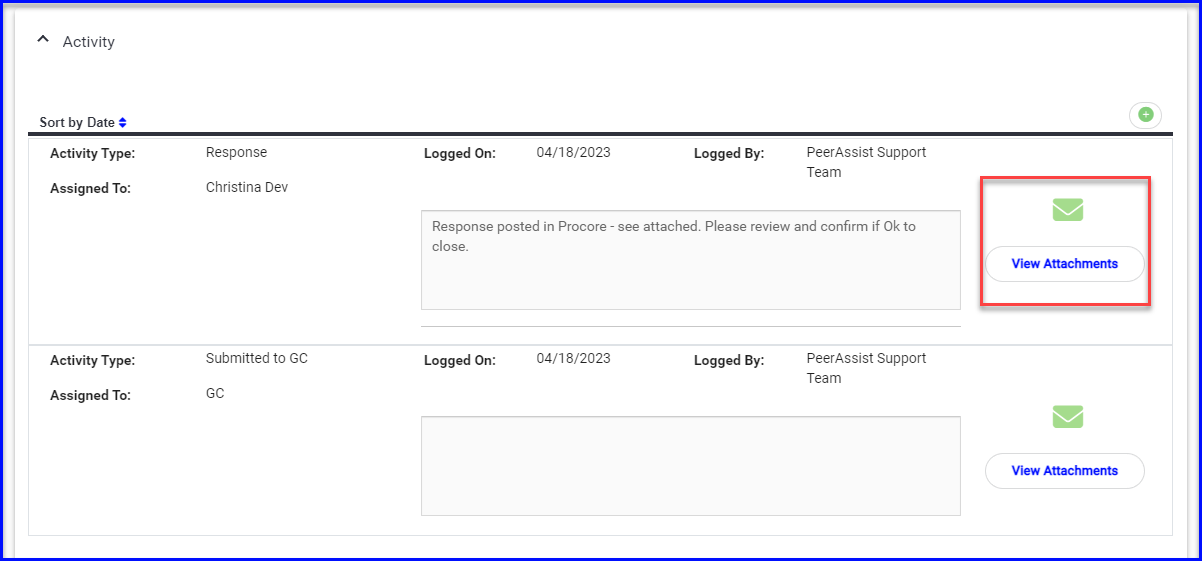
Each entry will display following:
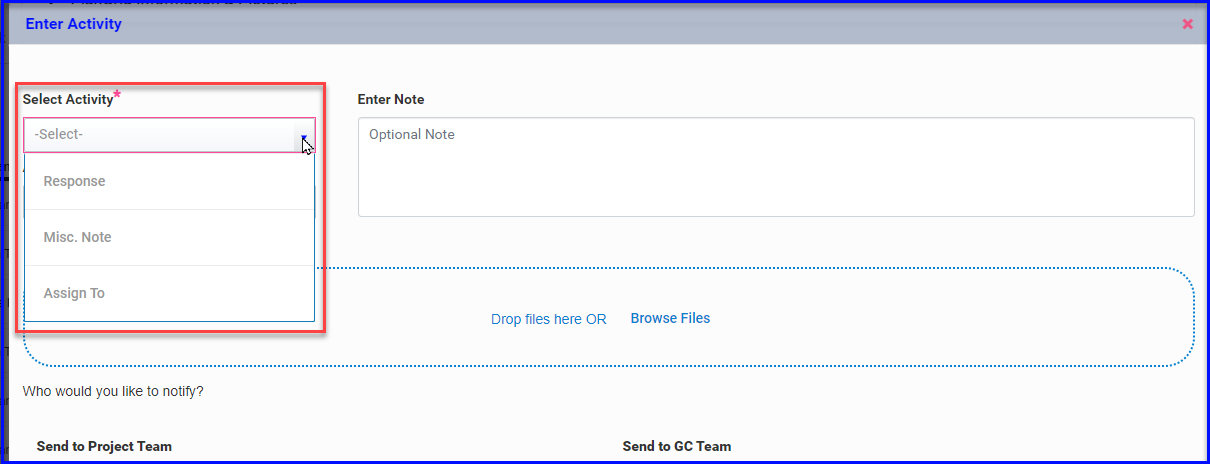
- Activity Type: Response, Misc. Note, or Assign To
- Assign To: Who the action was assigned to (you can always see the current assignment status on the dashboard, or at the top/right of the RFI)
- Who logged the activity, and when
- Email and Attachment shortcuts - hover or click as applicable to see who was included on the email and any corresponding attachments
RFI Responses
- Click on the RFI status and scroll to the Activity Log. The first activity will be when the RFI was submitted to the GC.
- A response might be logged one of two ways:
- The GC has the option to upload a response from a link in the email they receive when the RFI was submitted. This happens through their browser and does not require access to the PeerAssist platform. If they upload the response this way, team members will receive an email notification and can see it on the Activity Log.
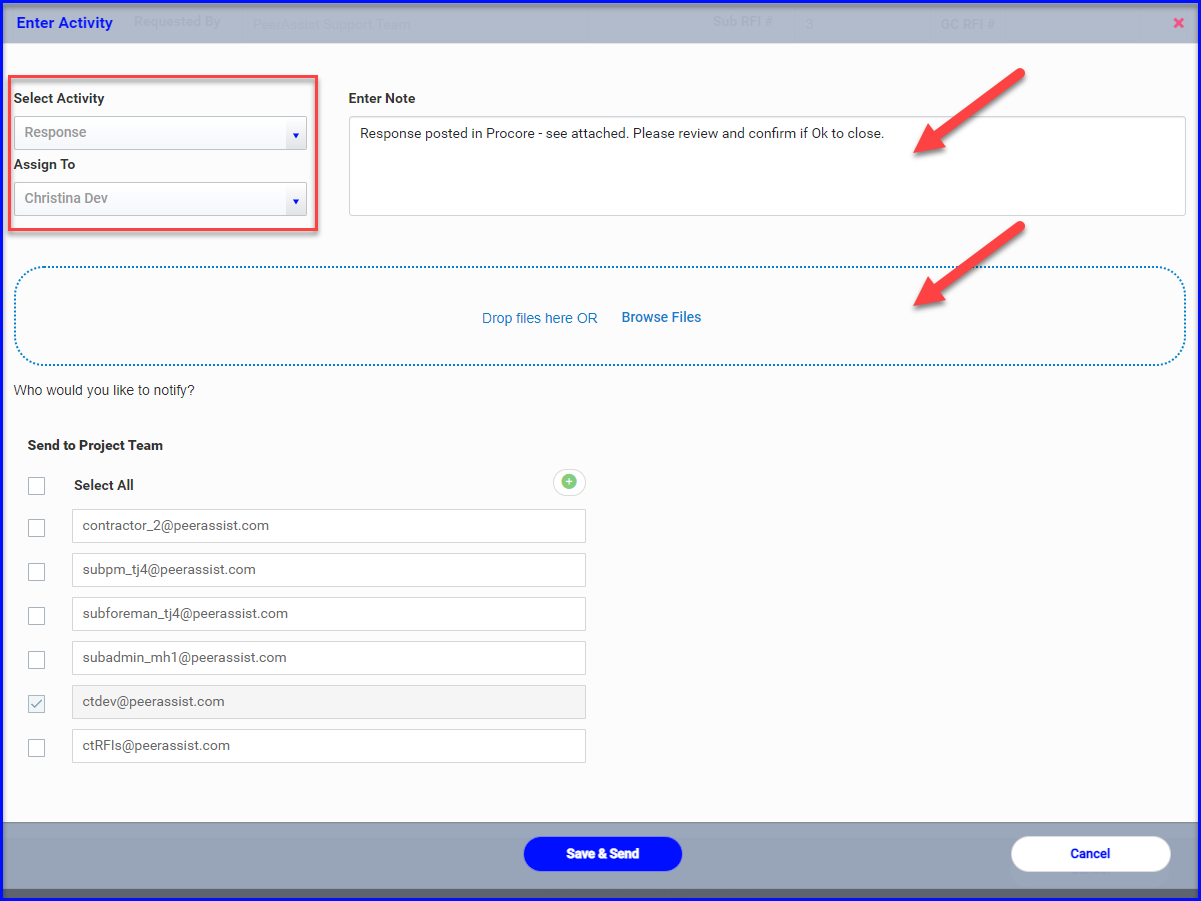
- Or, the GC may email or post the response for you to download, which you can upload to the Activity Log for all team members to review. Use the green + to add an entry.
- Choose "Response" in the Select Activity dropdown
- Select the team member who should review the response in the Assign To dropdown
- Add a note, e.g. "Response from Procore is attached" or "Please confirm if this RFI can be closed out" - this will be included in the outgoing email
- Upload attachments as needed
- Select/Deselect/Add email recipients as needed
- Save & Send to save to Activity Log and send email notification
- After logging the response, the RFI will automatically move to the Review Response step, and should be Assigned To the appropriate party.
- If the GC logs the response from the email link, it will be Assigned To the person who originally started the RFI by default. still testing?
- The field has the option on the mobile to mark the RFI "OK to close" which shows up on the log so that the office has confirmation that the RFI can be closed out.
- While in the Review Response step, team members can reassign and leave notes thru the green + on the Activity Log as needed.
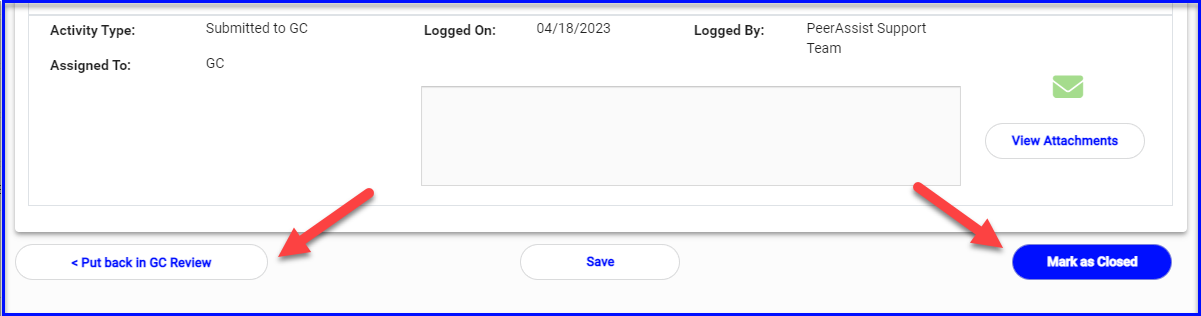
- If there are any follow questions for the GC, the RFI can be <Put back in GC Review
- If all partie have reviewed and the RFI response is sufficient it can be Marked as Closed. The status will change to Closed, and the Assign To will be blank.
- Team members can still use the cost/schedule impact fields and continue to log notes on the activity log as needed to document or coordinate tasks resulting from the RFI response.
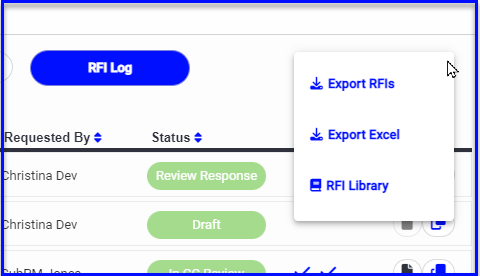
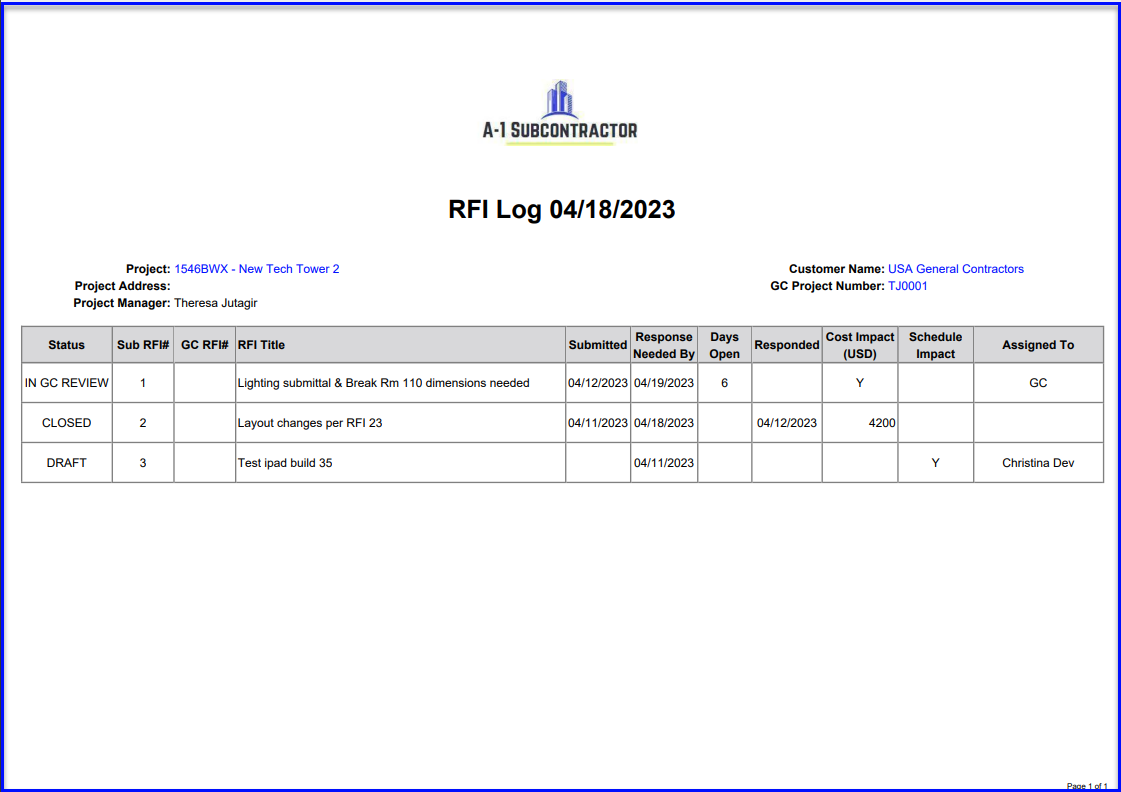
RFI Log PDFs
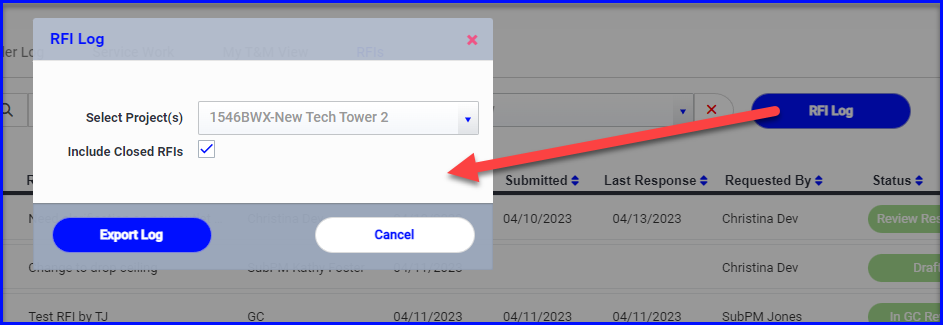
On the RFI dashboard there is a handy RFI Log button which allows you to quickly select a project(s) and whether or not you want to include Closed RFIs or not - this will generate a PDF that you can download in your browser and use in team meetings or share with the GC.
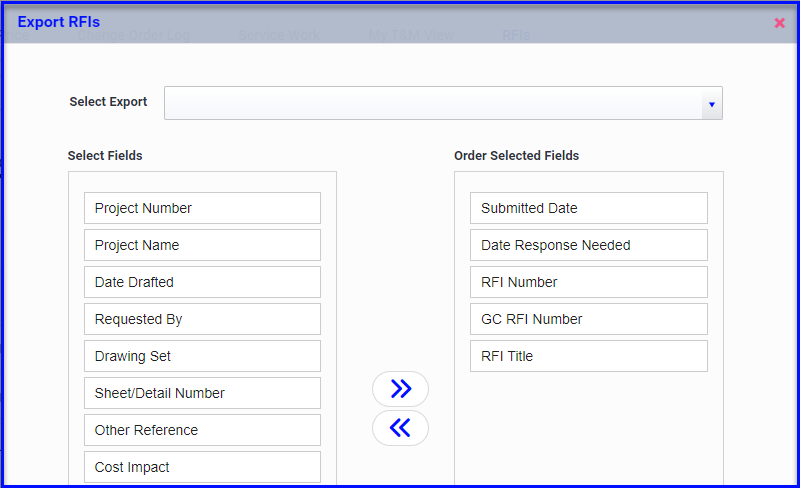
Filtering & Custom Exports
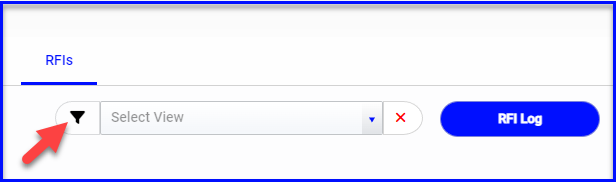
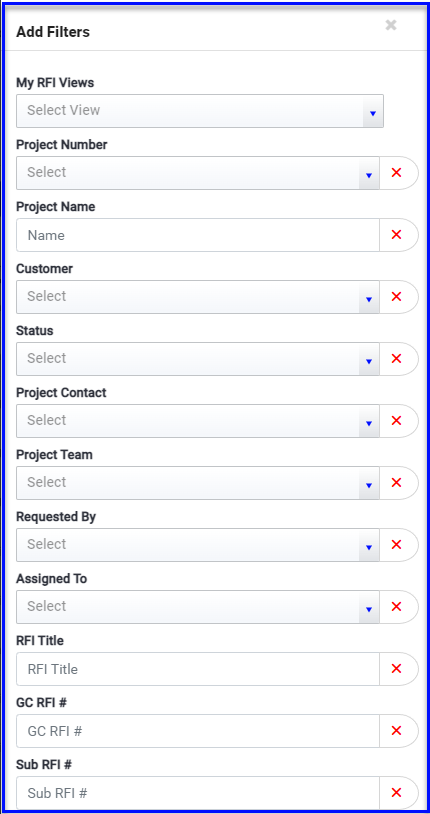
- Use the filter icon on the RFI dashboard to search and sort by project, status, team members, RFI #s and dates. For views that you will use regularly select Save to My Views and pull up the filter from the dropdown menu.
- When you have filtered the information you'd like to export, choose Export Excel from the menu icon at the top right. From here you can drag the fields that you want on your report, and Save Export Format if you'd like to select it from the dropdown in the future.