
You will need to add the GCs you work with at the company level in order to set up projects. Customers can be added individually or via .csv import.
Table of Contents
- Add Customers Individually
- Import a Customer List
- Build a Customer Contacts Master List
- Edit Your Customer List
Add Customers Individually
- Navigate to Admin > Customers and click on the New button
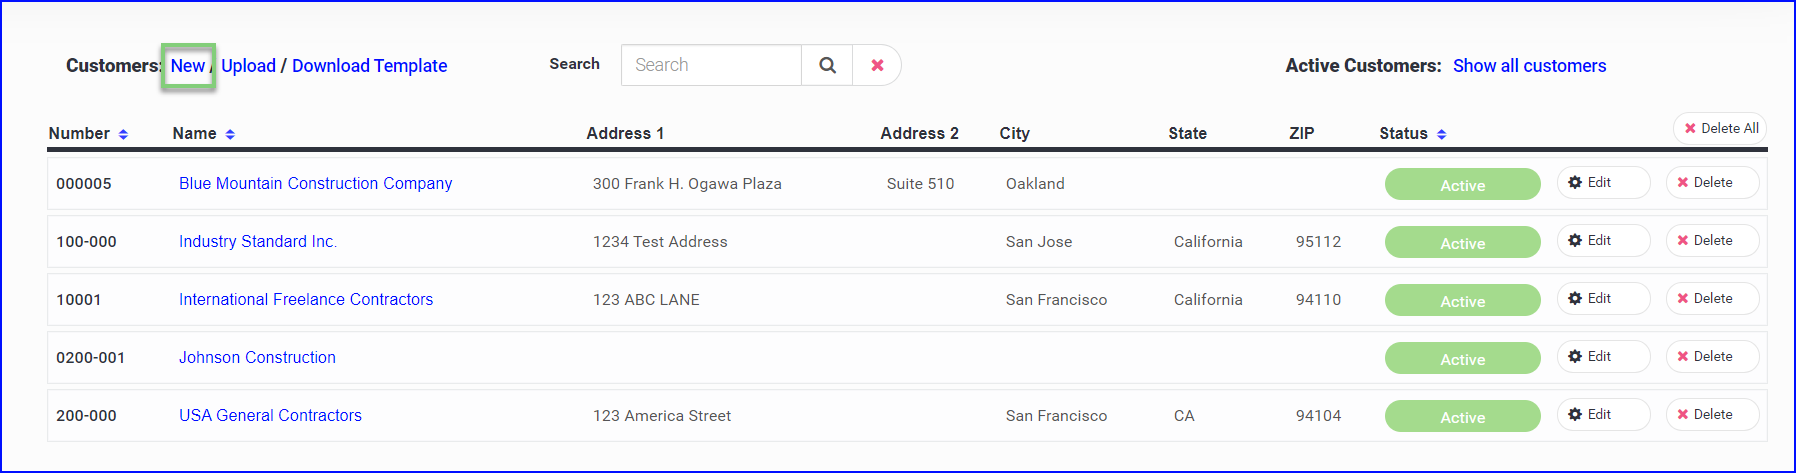
- Add the customer information and click Save

The GC contact should be an Admin or office contact.
You will be able to enter more specific GC teams at the project level.
Import a List of Customers
To import a larger list of customers, the upload feature can be used.
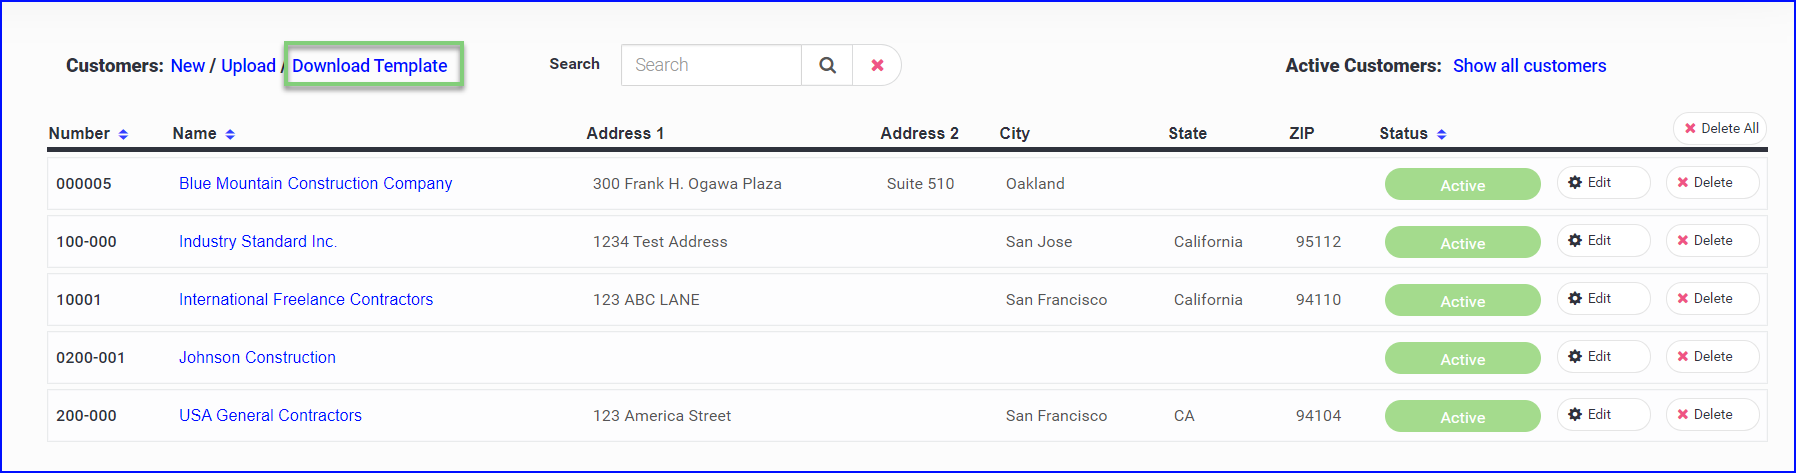
- In Admin>Customer, click on the Download Template button
- Open the CSV download
- Populate the (R) Required fields at minimum
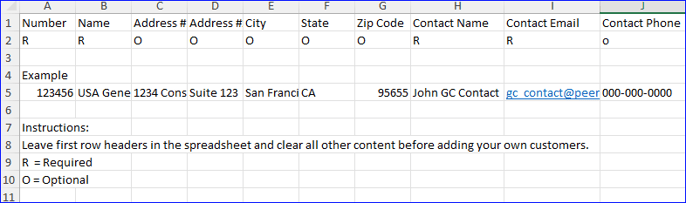
Number (R) - Your internal customer number (if you don't have one, consider using the first four letters or some abbreviation of their name up to 10 characters)
Name (R) - The customer's company name.
Contact Name (R) - This is the main customer contact and will be the default when a new project is created for this project. You will be able to add GC contacts for each project at the project level.
Contact Email Address (R) - This is the main customer contact email address and will be the default when a new project is created for this project. It can be overridden at the project level.
When finished, delete the Example and Instructions lines leaving only the heading and your customer data
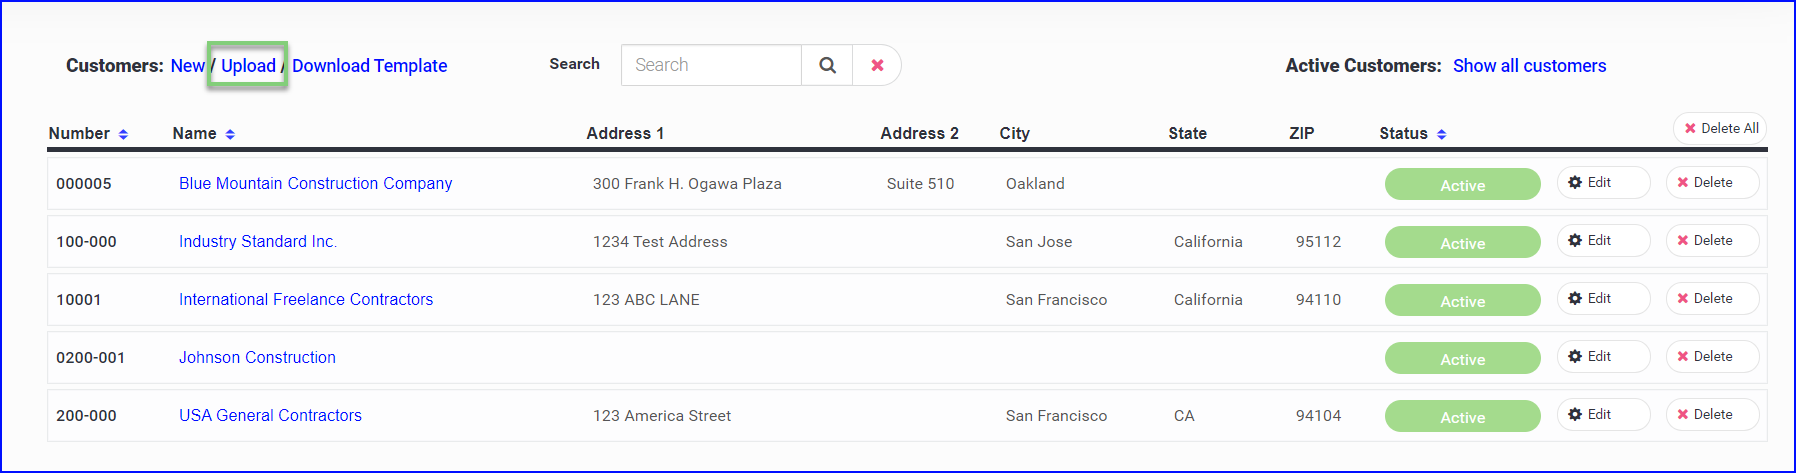
- Save as a .csv file and Upload in Admin>Customers
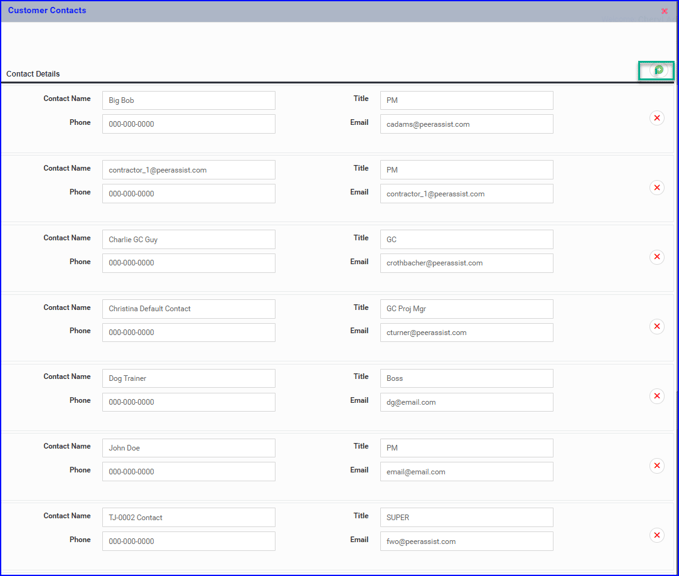
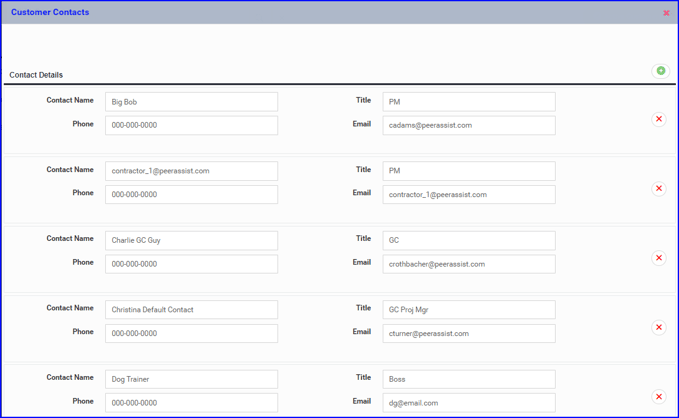
Build a Customer Contact Master List for selection on Projects
- Admin>Customer
- Click on the edit button

- Click on Customer Contacts
- Add as many contacts as you need by clicking on the green + button on the top right.
- The Contact Name, Contact Email, and Contact Phone is required.
- All contacts setup on the customer are available for selection on this customer's projects.
To set up a Customer Project Team
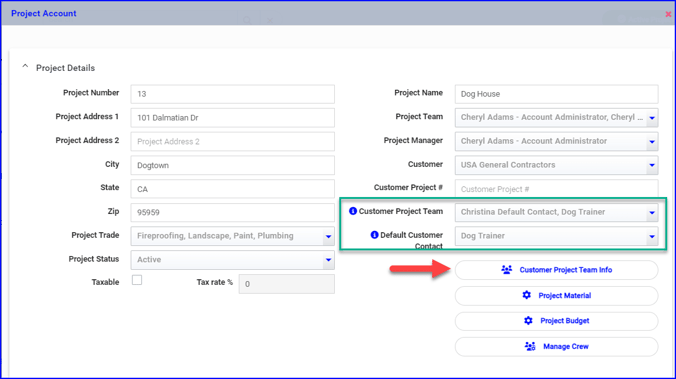
- Custom Project Team - You can select the customer contacts for each project, from a multi-selection dropdown list.
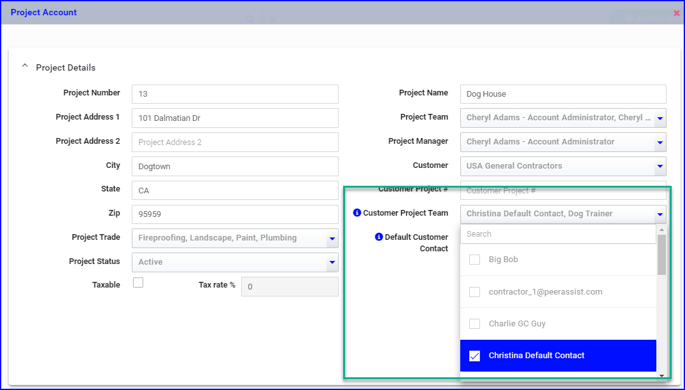
- Default Customer Contact - Shows a list of the selected Customer Project Team members for you to select from.
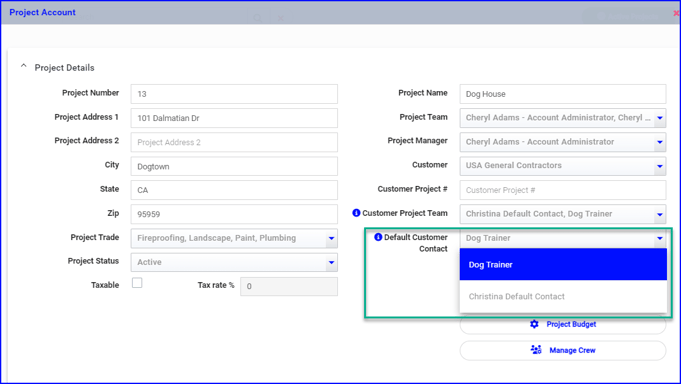
- Customer Project Team info - If a contact is needed but not in the Customer Project Team list, they can be added on-the-fly in the Customer Team Info screen.
- Contacts added on-the-fly in this screen will be pushed up to the Customer Contact master list.
- NOTE: All contacts selected will be visible in the Customer Project Team Info screen for easy reference.
If you need any assistance with uploading your customer list please contact Support.
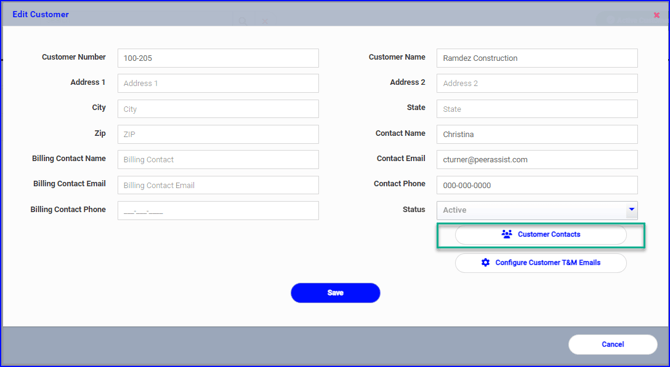
Edit Your Customer List
- In Admin>Customers, click on Edit for the customer you wish to edit.
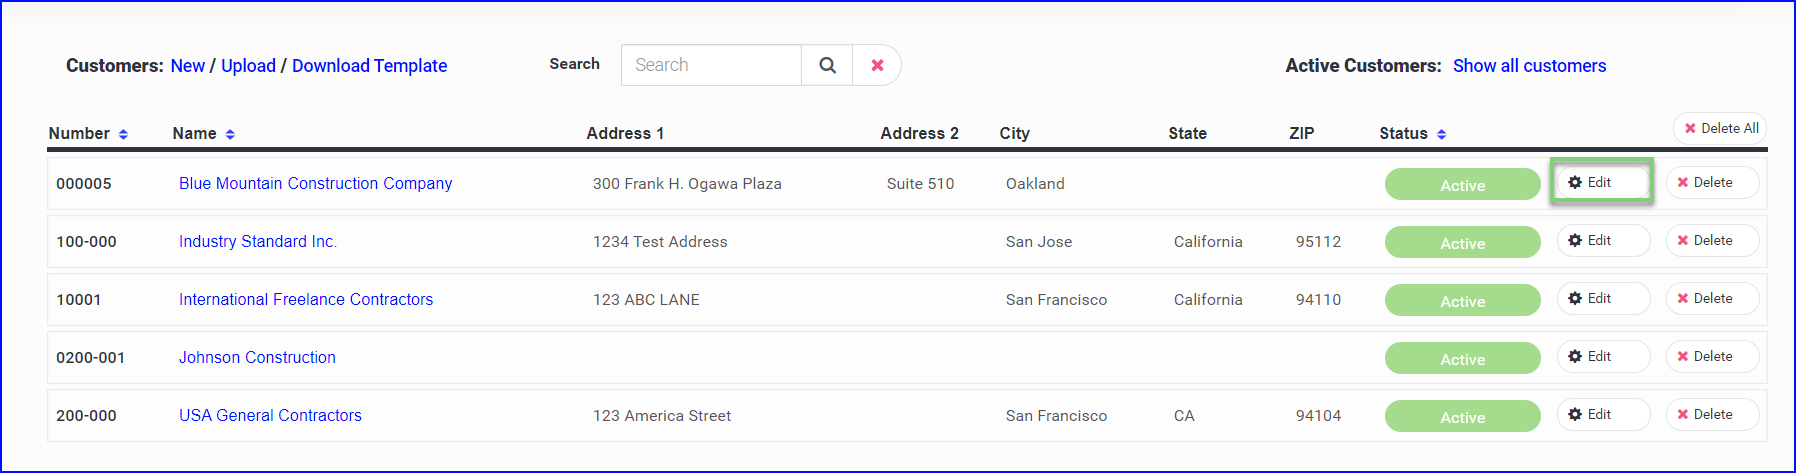
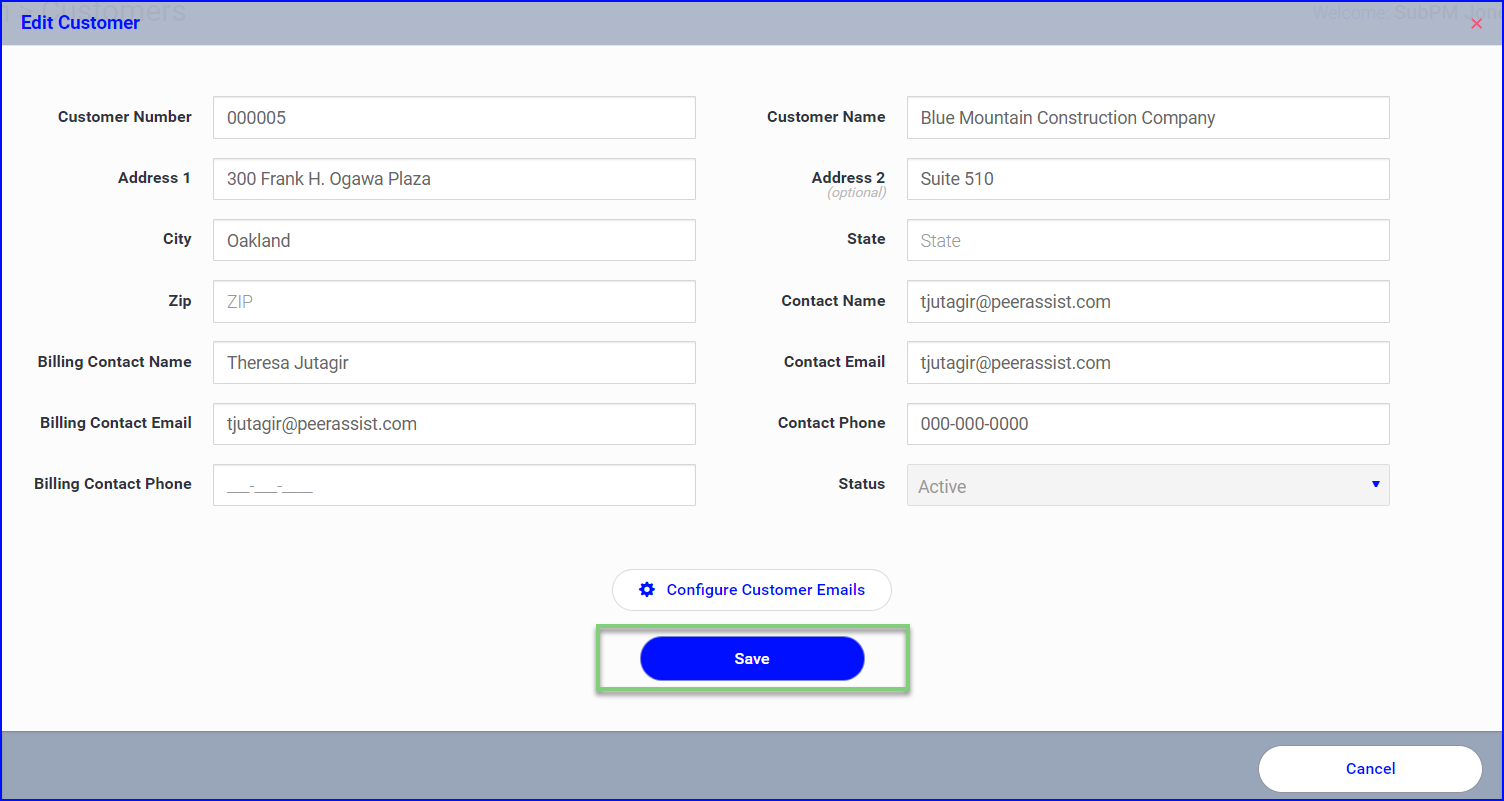
- Edit the information as needed
- Set their Status to Inactive if you want to remove them from the list during project setup
- Click Configure Customer Emails if you wish to set specific email preferences for your customer. Each email can be switched on/off for both the internal team and GC project team.

Email Preferences can be configured at the company level for ALL customers, but if a specific customer never wants to receive a certain email, Customer level Email Preferences would be the best place to set that.
If you have a project-specific email preference, that would be set at the project level.
- Save any changes
Your customers are set up!