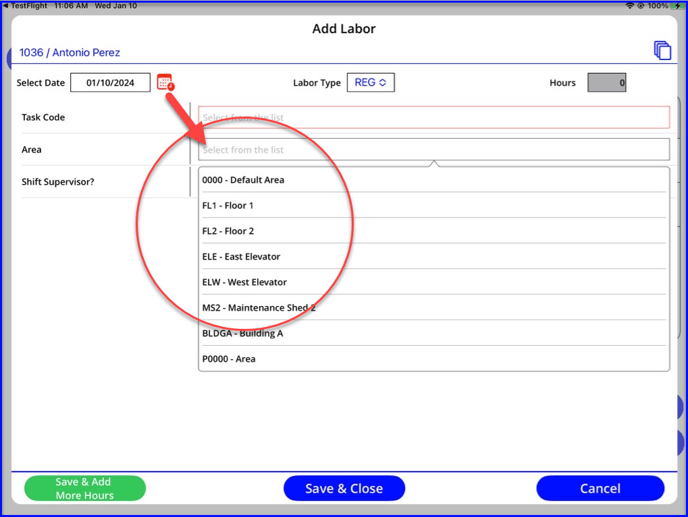
Learn how to set up and use custom lists in the PeerAssist platform.
Table of Contents
Custom Lists integrate with both our Field and Procurement modules. In Procurement, you can maintain your Cost Codes or Shipping Contacts for POs. In the Field module, you can customize dropdown selections for use on forms. This allows users to choose from a list of standardized responses, rather than key answers manually.
Create a New List
- In Admin > Custom Lists, click to start a +New List
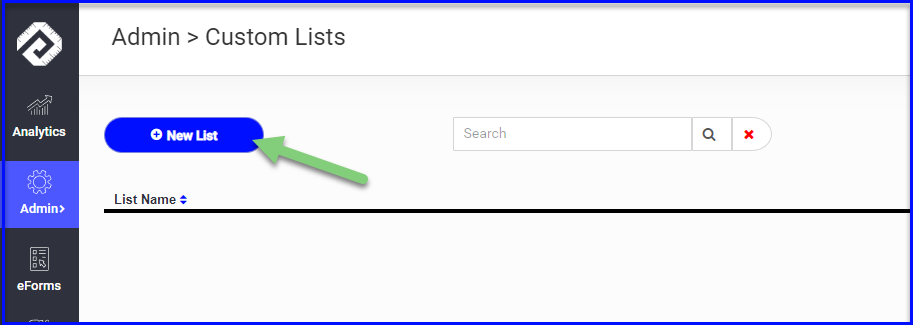
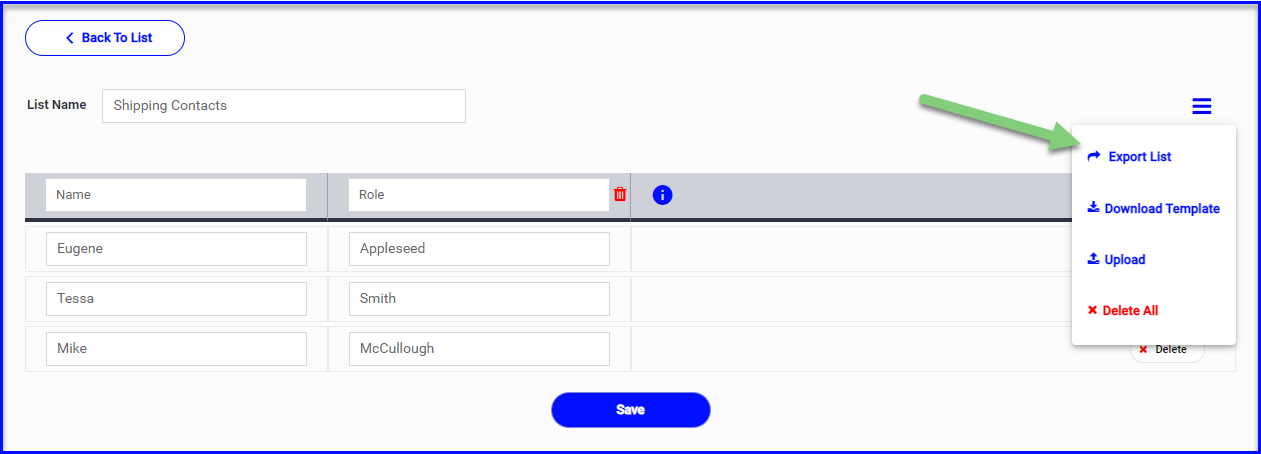
- Either download the template and upload your list through in the Menu icon at the top right
- Or, enter your list manually:
- Name your list
- Name your columns (up to 2 columns which you can drag to reorder and/or delete as needed)
- Use the +Add button to add line items (delete lines as needed)
- Save or use Back to List to leave without saving

To make changes to existing lists:
- Edit your lists from the Custom List dashboard
- Edit the list name, columns names and/or line items manually
- Or, Export the list and Upload changes in the Menu options

Procurement: Set List Defaults
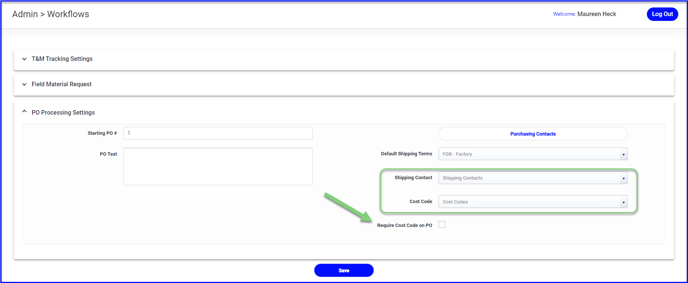
To begin using the cost code and/or shipping contacts lists, you will need to make them your defaults in Workflows.
- In Admin > Workflows > PO Processing Settings choose the appropriate list for the Shipping Contact and Cost Code dropdowns
- You can also check the box to make Cost Codes required if you like
- The selected lists will default to all purchase orders for all projects
Using Your Custom Lists on POs
You will be able to use your lists while filling out a purchase order:
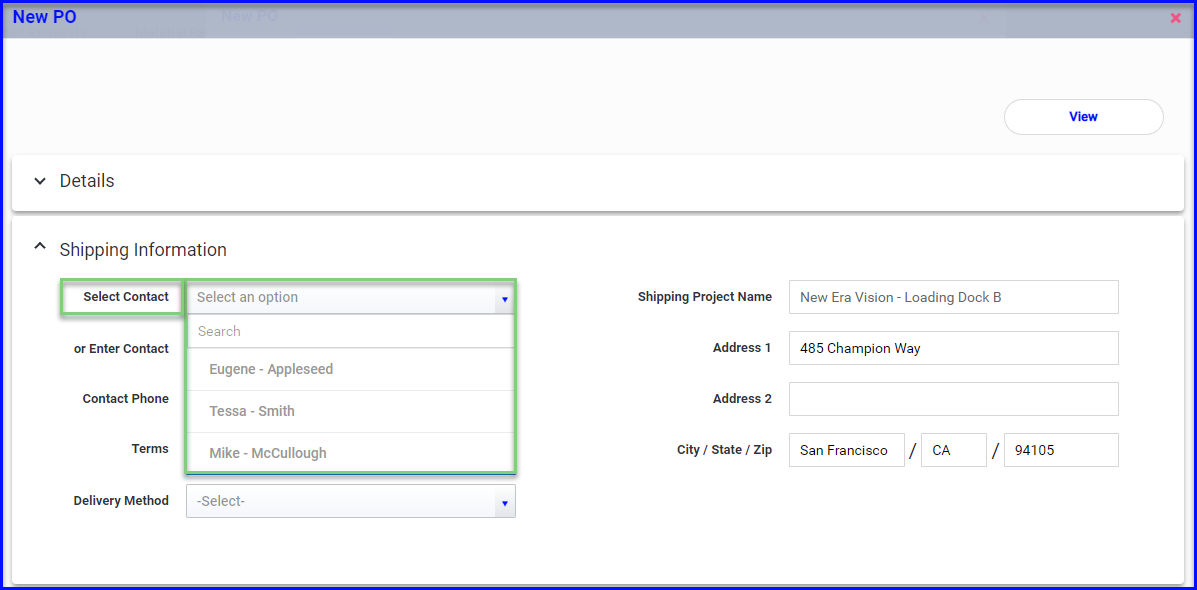
- Choose from your list of custom Shipping Contacts in the corresponding dropdown
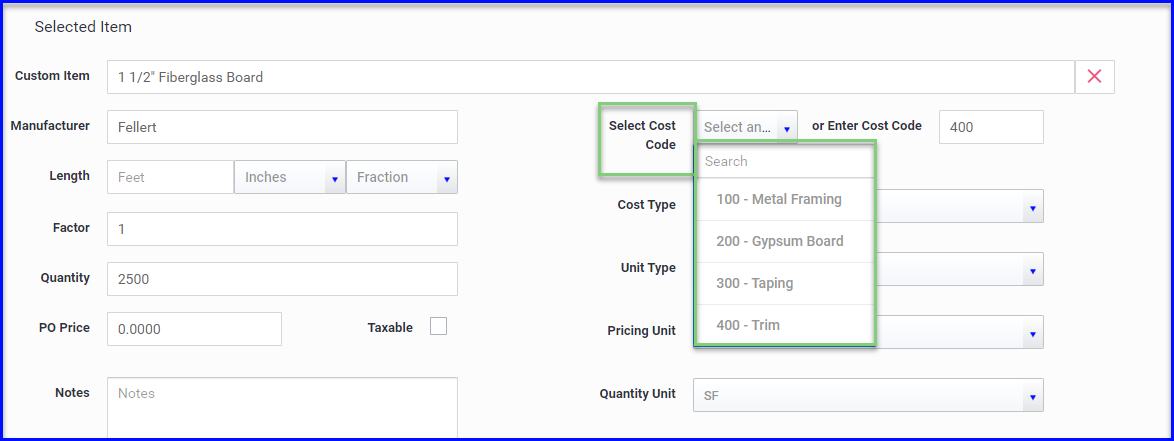
- Choose from your custom list of Cost Codes while adding material
- You can still enter the Cost Code manually if it is not on the dropdown list
- If Cost Codes have been made Required, you cannot proceed if both fields are blank
- If PO items are coming from an FMR or Material Release without a cost code, and cost codes are required, the user will be prompted to fill in the missing information
Field Forms & Timecards: Set List Defaults
To begin using custom lists on forms, you will need to point to the list from within the form.
- Open to edit the form in Admin > Forms.
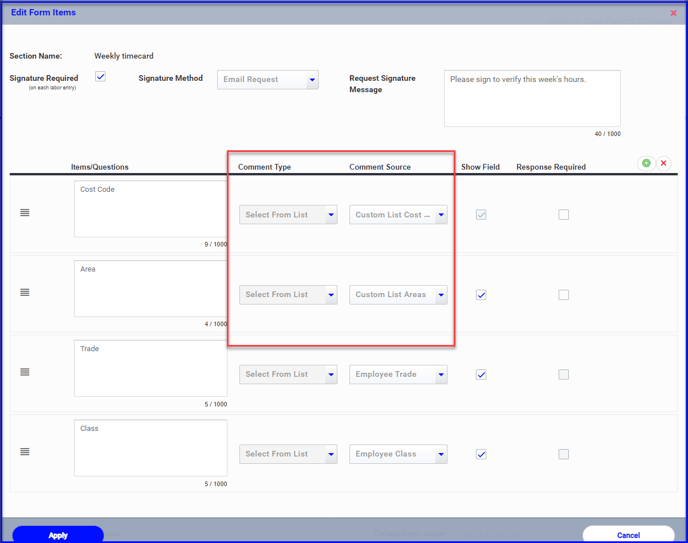
- For any "Comment" or "Labor" Section Type, update the following:
- Comment Type = Select From List
- Comment Source will show everything that is in Custom Lists, select the list that has the responses appropriate for the form and question
Using Custom Lists on Forms & Timecards
Now when the user answers the question, they can select an answer from the dropdown options you have provided from the custom list.
