
Learn how to do a basic project set up so that your team can begin creating tickets, forms and purchase orders! New projects will default to the company preferences, but can be modified per project as needed.
You will need to have the Users and Customers set up prior to setting up a project.
We recommend that default labor rates & OH&P preferences are set in Workflows prior to doing any project setup.
Table of Contents
- Start a New Project
- Add GC Project Team Members
- Manage Crews
- Configure Pricing
- Grouped Tickets
- T&M Settings
- Invoice Settings for Service Work
- Field Material Request & PO Settings
- Attachments
- Import Project List
Start a New Project
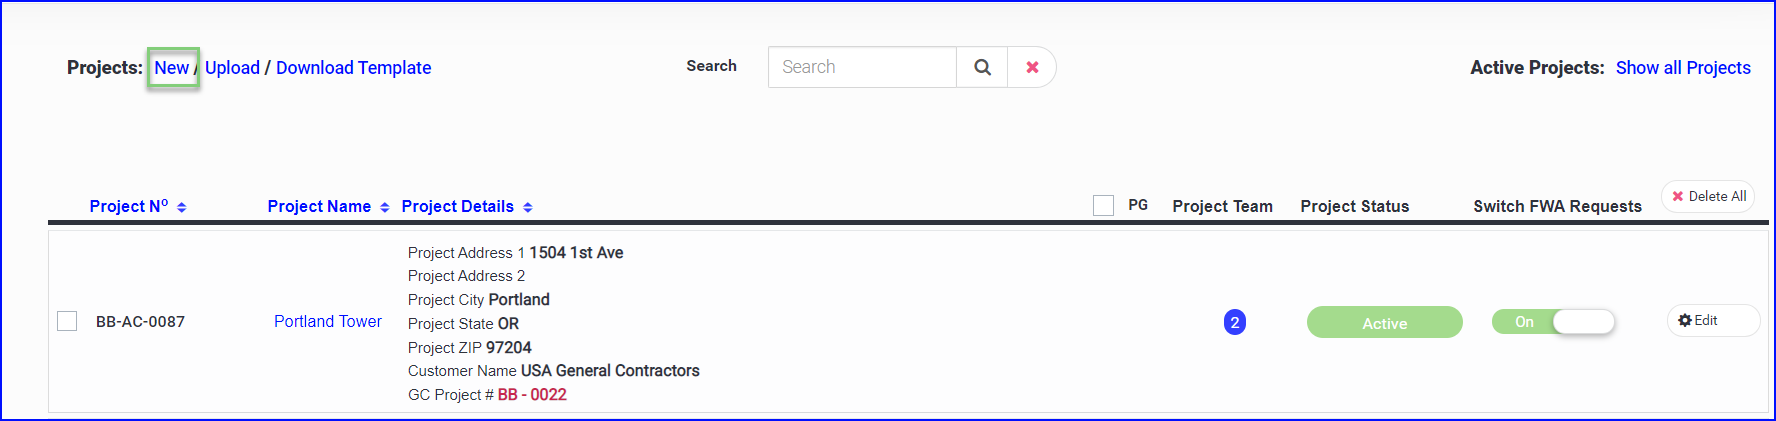
- Navigate to Admin > Projects and click on the New button
- Enter the basic project information and click Continue
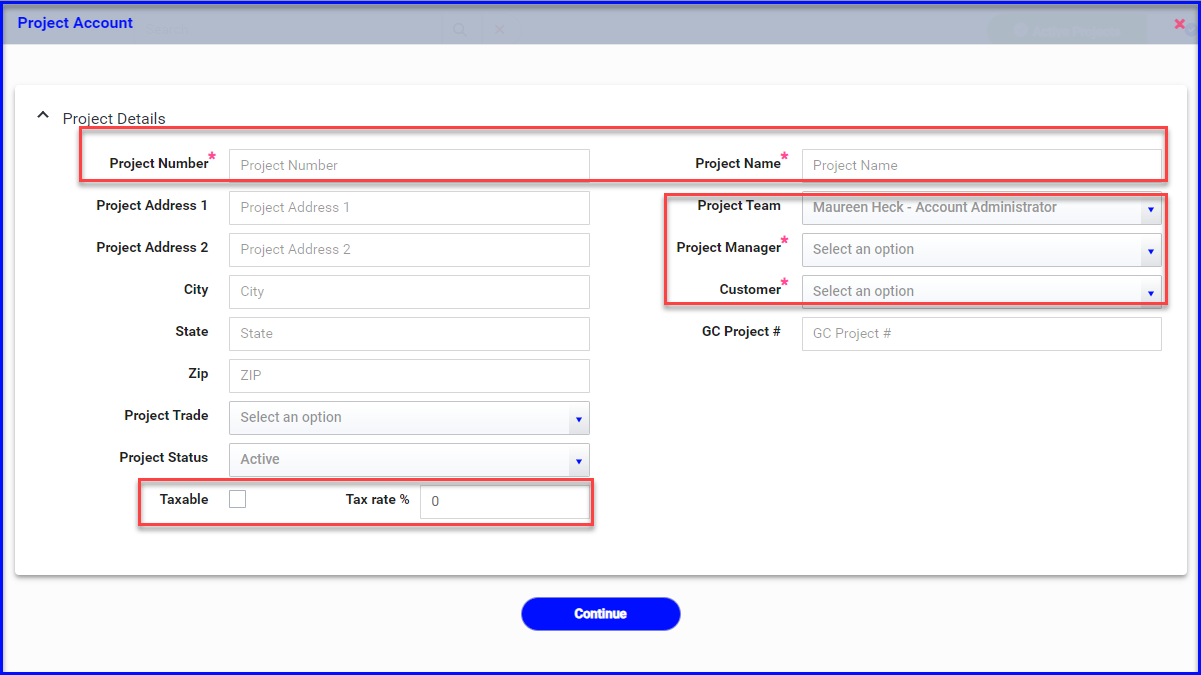
Here is an overview of the basic fields for the project setup (R= required, O=optional)
Name (R) Project name
Address (O) The address fields are optional but recommended. This information will be displayed on outgoing documentation such as change order requests and purchase orders.
Trade (O) - Select one or more trades that this project is associated with. This is informational only.
Project Team (R) - At least one project team member should be selected from your list of active users. Only team members selected will be able to view projects on the mobile or desktop version.
Project Manager (R) - This is typically the Project Manager and all CORs sent will appear to come from this person.
Customer - Select the GC for the project (from a list of customers you have added)
GC Project # (O) - Often the GC has its own project reference number. Enter it in here and it will be included in the cover letter correspondence and emails to the GC Tax Setting (O) - if the box is checked, the indicated % will be added to all tickets
- When you click Continue you will be able to access the rest of the project settings
If you prefer to import a list of projects rather than adding them individually, see below. After importing projects, you can Edit the project and continue with the next steps.
Add GC Project Team Members
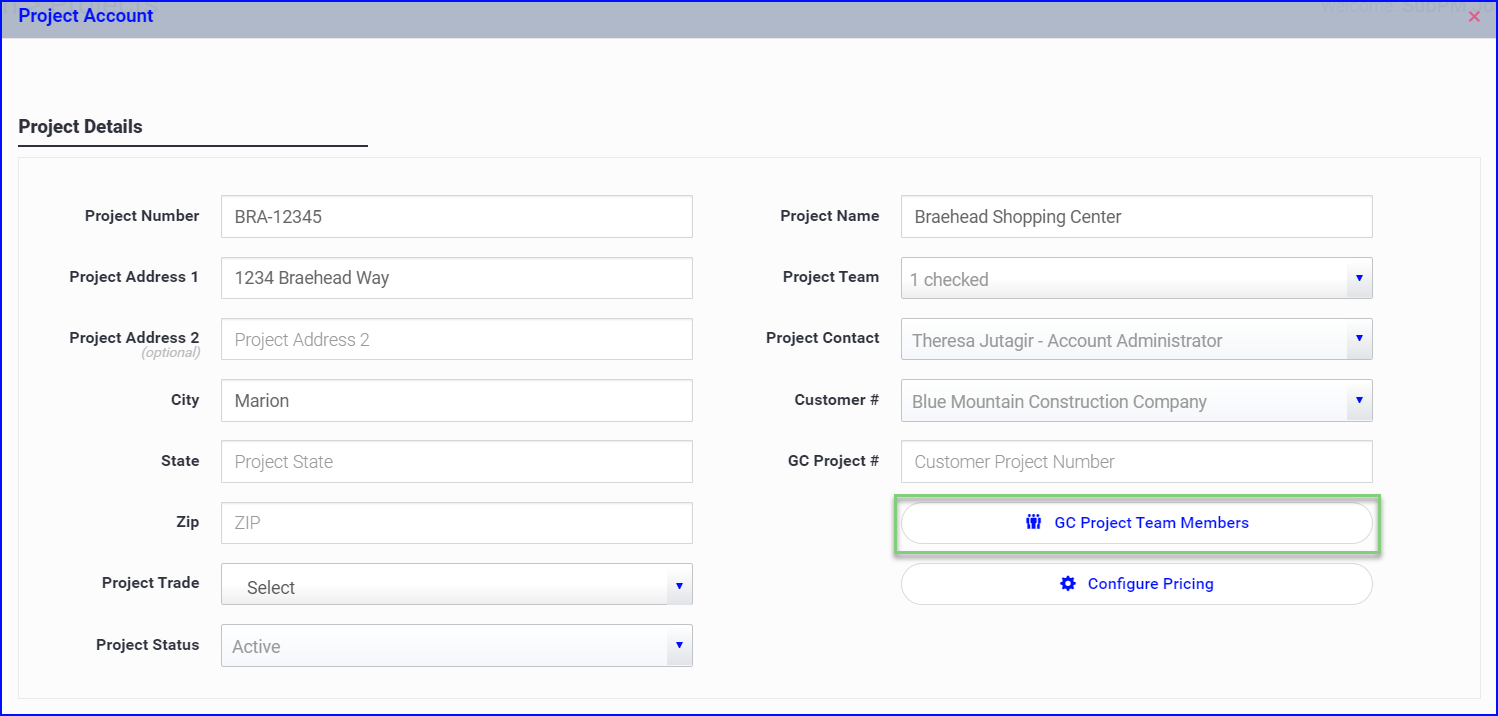
- Click on the GC Project Team Members button to set up the GC contacts for this project
-
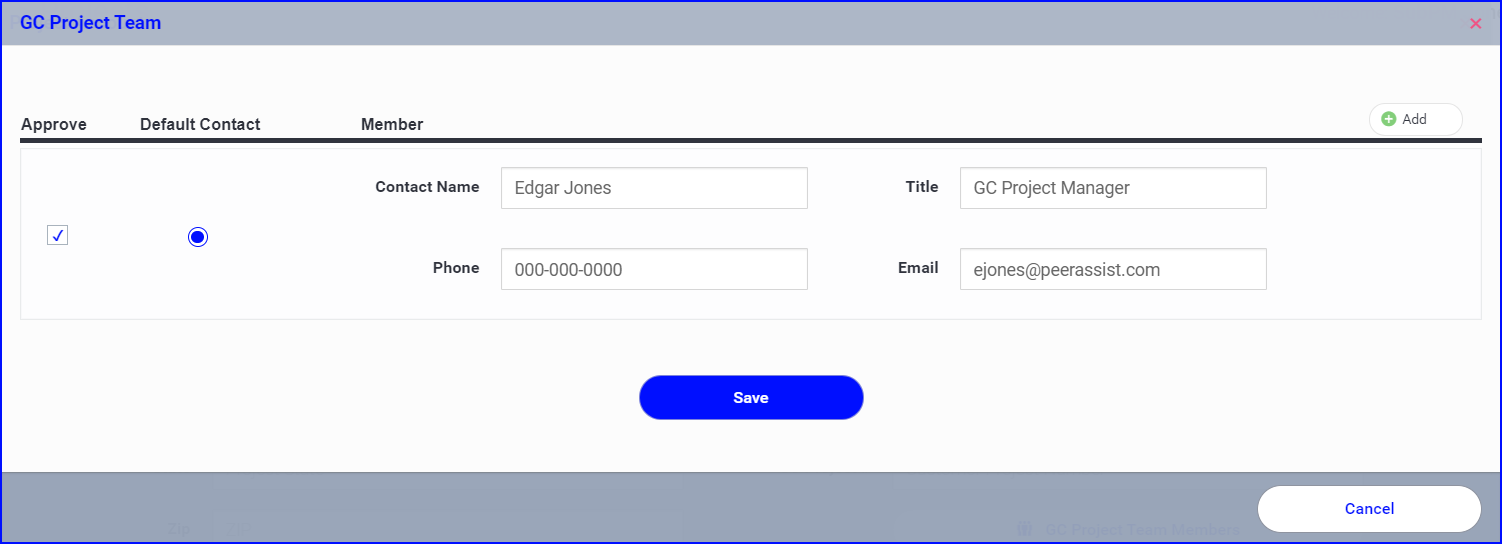
Use the green + Add button to add as many GC contacts as needed
-
Set the Default Contact, this is who the change order requests will be addressed to (usually the GC Project Manager).
-
Check Approve to indicate the person(s) authorized to sign Authorization Requests
-
Save to go back to the Project settings screen
Manage Crews
- You can setup project crews and assign employees to project crews. This is separate from “project teams”. The project crews are the field employees working on specific jobs.
- To access the Crew setup, go to the Employees User Accounts.
- To access the permission setting in Employees, click Employees and then check the Manage Crews checkbox.

- To access the permission setting in Projects, click Projects then check the Manage Crews checkbox.
Admin > Employees
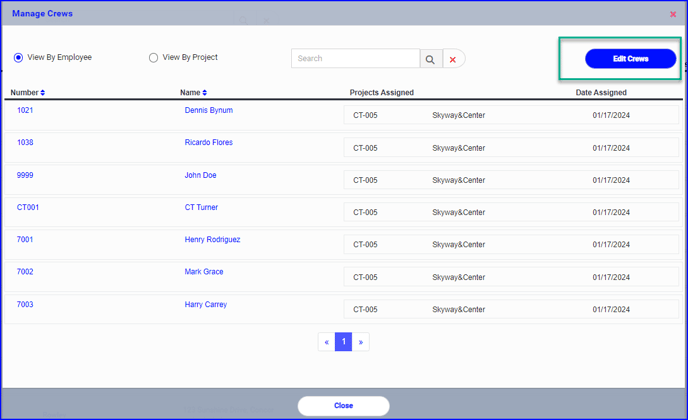
- Manage Crews – This button is now visible on the top right side of the Admin > Employees

- If the user has permission checked, the button will be enabled. (see notes above on enabling users)
- If the user does not have permission checked, the button will be visible but disabled.
- When opening the Manage Crews from Admin > Employees, the crew maintenance will default to “View by Employee,” which shows a list of employees who are assigned to at least 1 project crew, along with the project(s) they’re assigned to.
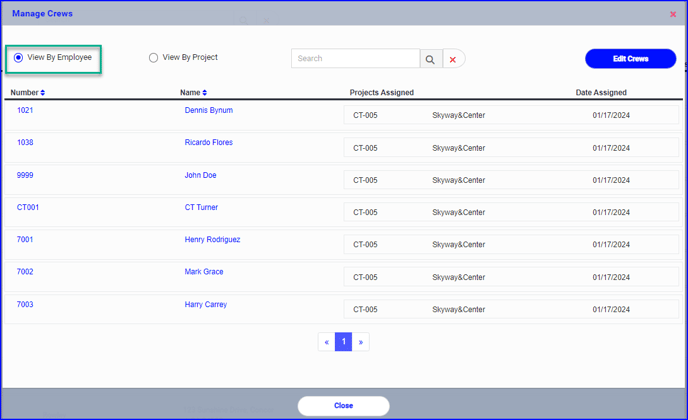
- This view allows users to maintain existing crew assignments. If an employee is not assigned to a crew yet, the user will click Edit Crews, then select the Employee from the dropdown and select at least 1 project to assign them to.
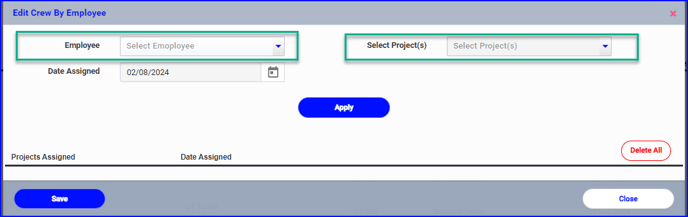
- Select the Employee, select the project(s), then click Apply.
- Click Save to save the setup.
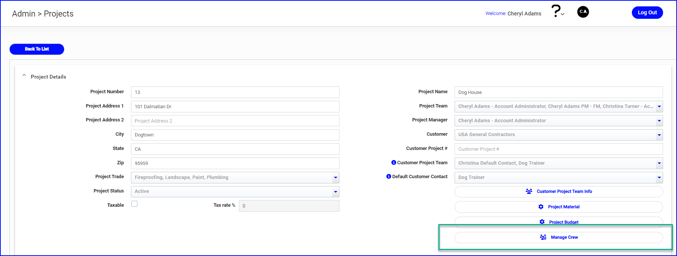
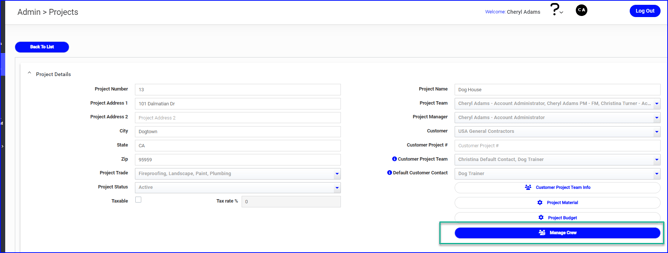
Admin > Projects
When accessing the crew setup by project, there is a slight difference. The user will only be able to view/edit that project’s crew when clicking into the Manage Crews button.
Manage Crew – This button is now visible in the Project Details section of the project setup screen.
- If the user has permission checked, the button will be enabled. (see notes above on enabling users)
- If the user does not have permission checked, the button will be visible but disabled.
- When clicking this button in a project, the user will be taken directly to the Edit Crew by Project. The Project will default to the current project and be disabled.

- Select 1 or more employees, click Apply, then click Save.
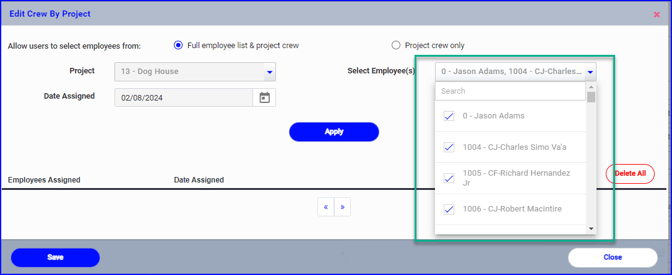
- Crew members can easily be removed from a project by clicking the red X next to their name, or similarly a project can be removed from an employee by clicking the red X.
T&M Tracking Settings
Below are some of the settings related to our T&M module that can be adjusted at the project level:
- Link the project in PlanGrid (read more here)
- Configure Project Emails - this is where you can designate which emails get sent to the GC and Internal teams
- Configure Pricing - this is where you can customize the billing template for the project, and upload your project-specific material list & trade rates. If you do not make any changes, they will default to what is set up at the company level. You can find detailed information about configuring pricing at the project level here.
- Indicate whether you want to include a ROM when emailing the GC about a ticket in-progress
- Make Authorization Requests mandatory for the project
- Set Default Work Type as Field Work (to produce change order requests) or Service Work (to produce invoices)
- Change the starting ticket number or format
- Change the number of signatures required on a ticket
- Turn on the Daily Signature feature (this will give the field the option to get a ticket signed daily without closing the ticket)
- Enter a Starting COR# if you would like them automatically numbered for you
- Set a Pricing Add-on to be added to all project tickets, e.g. a bond %

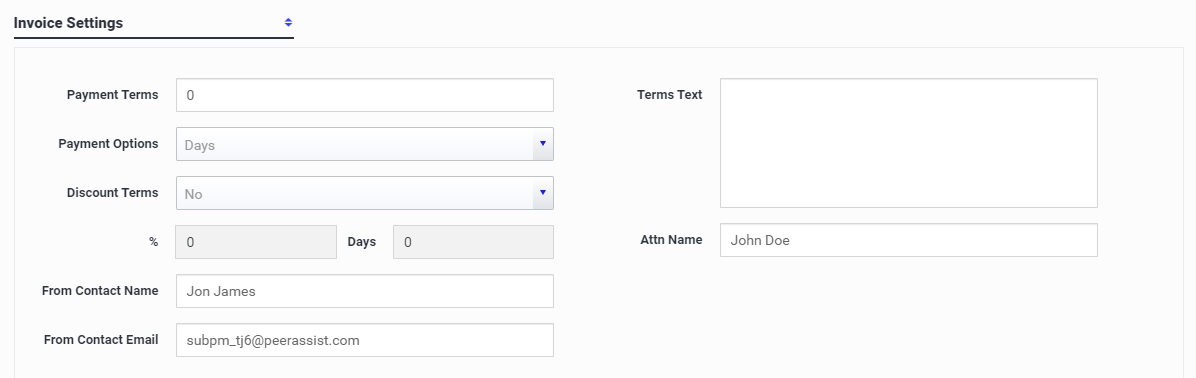
Invoice Settings for Service Work
If you will be using T&M tracking for Service Work you can adjust the payment criteria for the project.
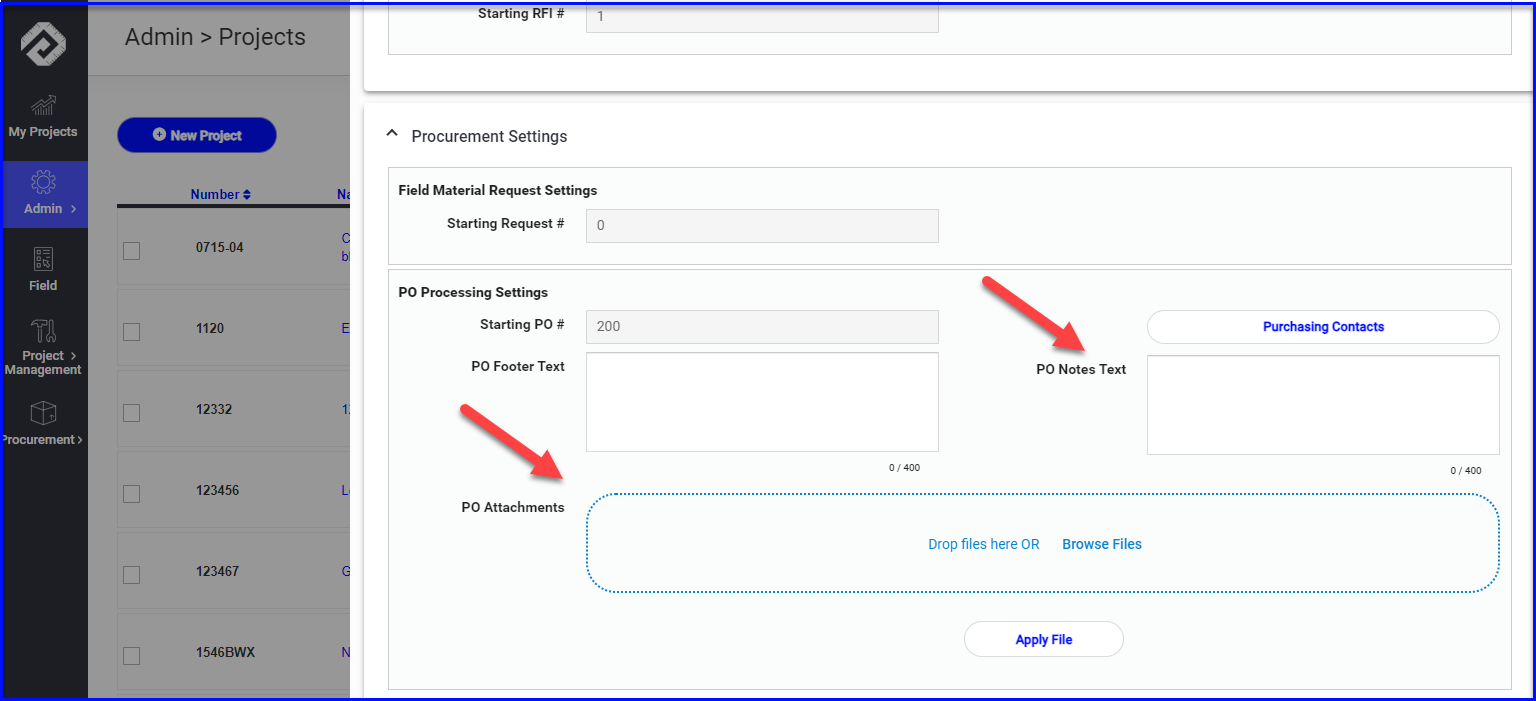
FMR & PO Processing Settings
If you are using Field Material Request and/or PO Processing you can adjust the project settings here.
- Starting FMR# or format
- Starting PO# or format
- Standard PO Footer Text
- Standard PO Note Text
- Attach any files that should be included with all POs for this project
- Add any purchasing contacts that are not project team members or already a purchasing contact for the whole company
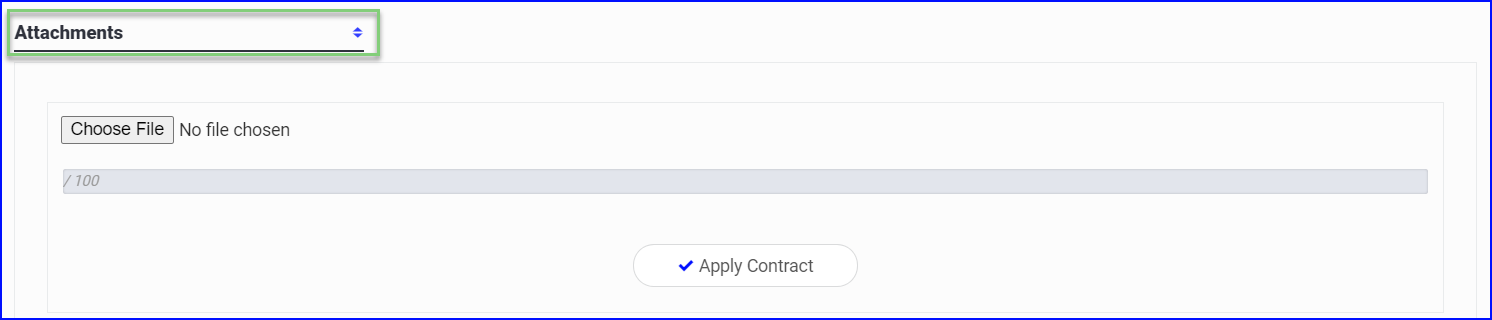
Attachments
You can add a document that you would like to associate with the project (such as the contract).
- Choose File to select the document from your desktop and Apply Contract to save
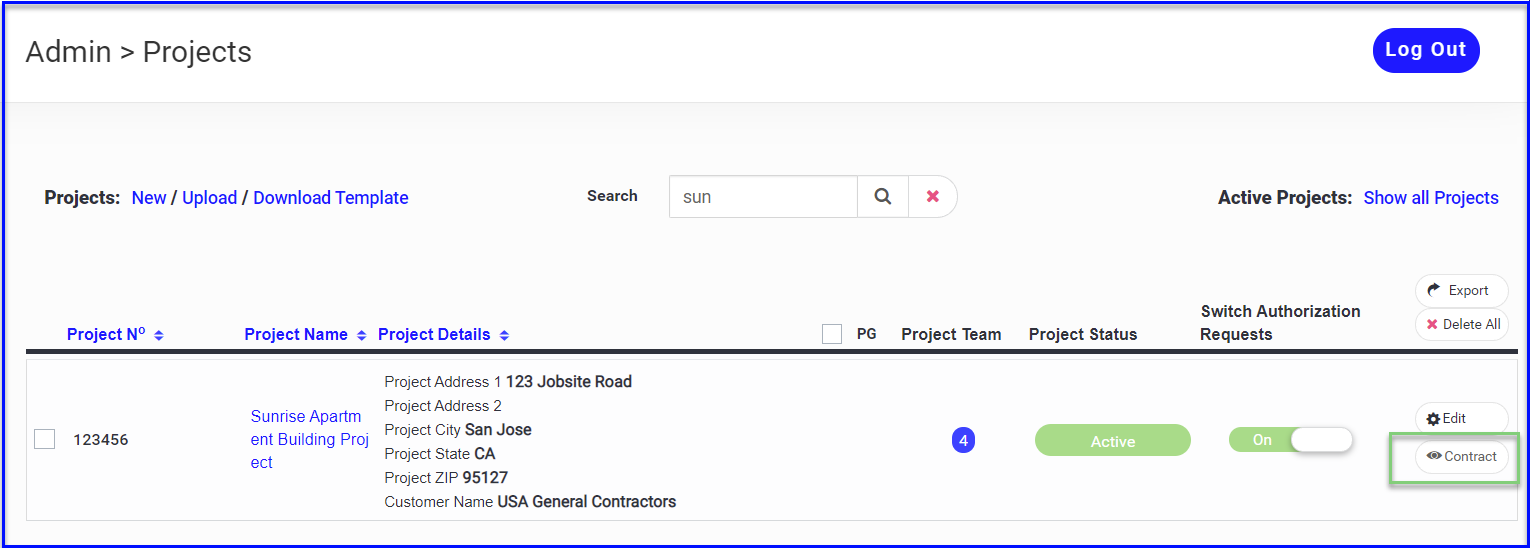
- You will see that there is a document attached to the project from the Project dashboard:
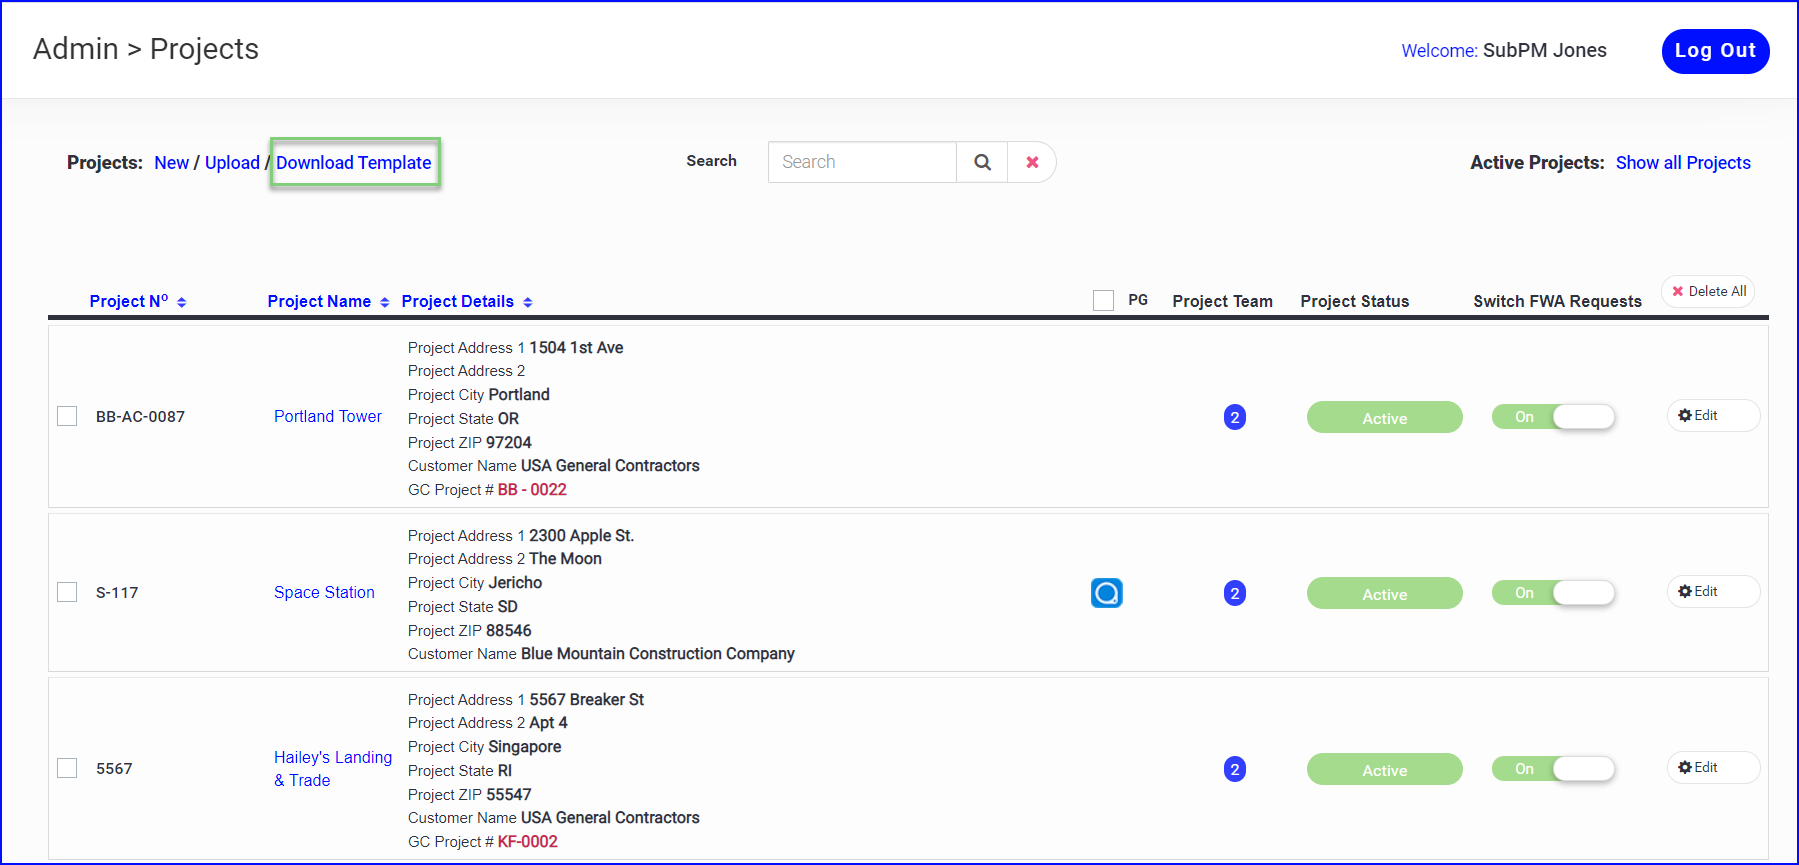
Import Project List
If you prefer to import a larger list of projects (rather than add them one by one), you can download a template to format and then Upload. Then you would Edit the imported project to access the settings referenced above.
- Click on the Download Template button.
- Open the .csv download and fill out the data.
- When finished, delete the example and instructions (leave the headers and your data)

If you need assistance importing a project list please contact Support
- Save as a .csv file and Upload
Once your project is set up, you can begin creating tickets, eForms and purchase orders!
Quickly jump to the information you need above:
- Start a New Project
- Add GC Project Team Members
- Configure Pricing
- Grouped Tickets
- T&M Settings
- Invoice Settings for Service Work
- Field Material Request & PO Settings